


 Рейтинг: 4.5/5.0 (1858 проголосовавших)
Категория: Инструкции
Чтобы ознакомиться с инструкцией выберите файл в списке, который вы хотите скачать, нажмите на кнопку "Загрузить" и вы перейдете на страницу загрузки, где необходимо будет ввести код с картинки. При правильном ответе на месте картинки появится кнопка для скачивания.
Если в поле с файлом есть кнопка "Просмотр", это значит, что можно просмотреть инструкцию онлайн, без необходимости скачивать ее на компьютер.
Чтобы ознакомится с другими нашими инструкциями воспользуйтесь поиском вверху страницы, либо через навигацию на главной странице.
В случае если инструкция по вашему не полная или нужна дополнительная информация по этому устройству, например драйвер, дополнительное руководство пользователя (у одного устройства может быть несколько руководств, например, руководство по обновлению), прошивка или микропрограмма, то вы можете задать вопрос модераторм и участникам нашего сообщества, которые постараются оперативно отреагировать на ваш вопрос.
Обзоры и видеоинструкции:
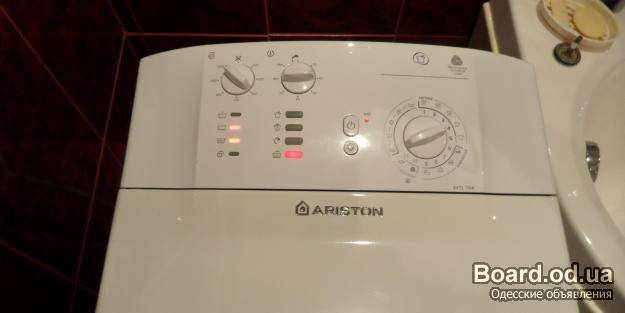
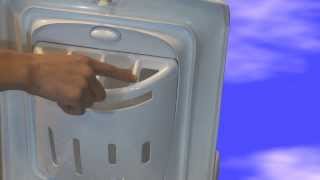
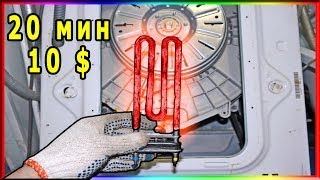
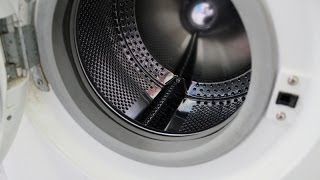
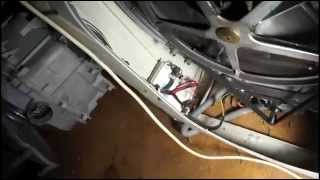
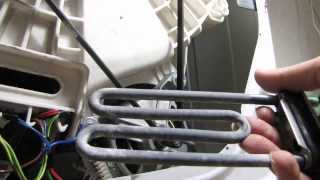
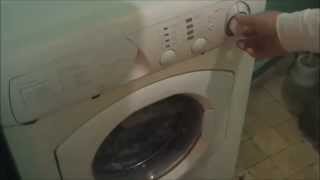
Неисправность Hotpoint Ariston AVTL 83

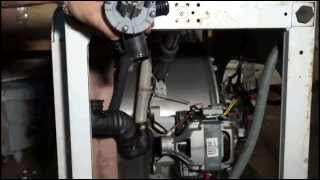
Как не надо менять подшипники в стиральной машинке
Форум Hotpoint-Ariston AVTL 83:
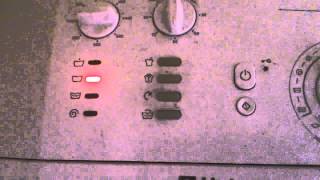
здравствуйте при запуске начинает стирать и минут через 5. 10. по разному — отключается даёт сбой. мигают две нижние кнопки ключик и старт. что с ней?

Не могли бы вы помочь? Стиральная машина Ariston AVTL-83 индикатор ВКЛЮЧЕНИЕ/ЛЮК ЗАБЛОКИРОВАН часто мигает одновременно с индикатором СУПЕРСТИРКА, где можно посмотреть коды ошибок и найти сервисное руководство. Спасибо!

Здраствуйте, машинка включается начинает стирать, но при любой стадии слива воды. Сливает воду но насос не отключается и машинка высвечивает ошибку (моргают значек блокировки дверцы и значек супер стирка). Что может быть?
![]()
здравствуйте. у меня стиральная машина Hotpoint Ariston ARTL 47. До этого времени работало очень хорошо. Вчера бросил в стиралку вещи не сильно загрязненные. Она по схеме и по времени все правильно делало но после окончании стриния белье и вещи все мокрые хотя отжим был на 1000 оборот мин. Во второй раз так же по времени стирала после окончание вижу половина вещей сухая не мокрая а половина мокрая и порошок не растворился и не был использован. Вроде отжимает по звуку определяю полоскает но в результате мокрые не отжатые и не отмытые вещи. Как поступить может я не правильно что нибудь делаю? Или стиралка сломалась. Помогите пожалуйста.

Здравствуйте! Машинка временами не стирает, включаю режим стирки, она начинает заливать воду и останавливается и посто гудит, барабан не крутиться, потом ставлю на слив- сливает. и все. в чем тут проблема? А иногда включишь и стирает нормально. как ее можно разобрать и что надо сделать либо поменять?


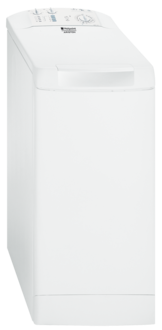
Модель, к которой подходит эта инструкция: Hotpoint-Ariston AVTL 83
Данная инструкция написана на русском языке
Вопросы и отзывы о Hotpoint-Ariston AVTL 83Пожалуйста, если у вас есть вопрос или отзыв, напишите пару строк в форме ниже. Если вы скачали инструкцию, но не смогли разобраться, как пользоваться той или иной функцией прибора, напишите свой вопрос, наши специалисты постараются найти ответ на ваш вопрос.
© 2006 — 2012 "Инструкции по эксплуатации": бесплатное скачивание инструкций по эксплуатации.
Автор: Елена Мараховская-Мороз
Решил что дело именно в модуле потому что подкидывал ещё на 2 машинки Indesit с соответствующей прошивкой. Любой мастер это знает. Після зовнішнього огляду прийшов до висновку, що вода просочується з під кожуха водонагрівача. Во что вас бить ещё, продолжающие своё упорство. My name is Tamas Szamosi. После стирки остаётся гореть индикатор стирки, на табло высвечивается 0:01, а машинка постоянно гудит. Aqua сontrol Двухслойный шланг, выдерживающий до 10 бар. Ядавно так не болдел,аж живот заболел. Если кто-то ремонтировал силовую плату-прошу рассказать подробности. Коды F01- F12 индуцируются на ЖК-дисплее машин Indesit серии Evolution. И еще - завозят ли сейчас в Киев Аристоны итальянской сборки? Прочистил на всякий случай контакты в прессостате и чуть растянул пружинку контакта. После часа работы она останавливается и ни чего не делает в течении 15-25 минут. Там и без схемы все на виду. Процедура проверки может быть повторена столько раз, сколько это необходимо.
Гостевая книга - ariston сервисный центр аристонВам, перед принятием решения о целесообразности ремонта стиральной машины необходимо произвести комплексную диагностику. Инструкция на русском прилагалась. F07: Залипание реле нагревательного элемента.
Проблема вот в чём. Процедура проверки может быть повторена столько раз, сколько это необходимо. С потерей товарного вида, но если будет работать - стерпится. Если вода идет самотеком то включи слив и убедись что давление поднимается в шланге.
Вобщем тэн надо менять. Моей стиральной машине Аристон ALS 109X 8 лет. На одном из форумов я читал ответ от специалиста сервисного центра, который утверждает, что эта ошибка на машинах ARISTON AVD 109EX означает, что не срабатывает реле нагревателя и что помогает зачистка контактов тена. После замены при включении сгорели два резистора 1кОм и 560Ом на модуле и дорожка, по включению от замка. Машинка Indezit W83T, на сколько понял управление у нее беспроцесоное. » — «Нет, — прервал его Нерон, — Пока живу! Сказали что модуль мертвый умер микропроцессор. заменить его не могут так как их нет, нужно покупать модуль 800грн. Она стирает на режиме и начинает викачивать воду во время этого переключатель режимов начинает круться и крутся даже после того как выкачает воду Я думал что нужно подождать ждал 30 мин. Подскажите пожалуйста с чем это может быть связано,что нам стоит предпринять для ремонта и сколько приблизительно это будет стоить?
Ariston avtl 83 инструкция на русском - добавлено по просьбе Валера Парфенов .
При этом моргал индикатор. Распиши может быть и проблема со сливом воды. На режимах продолжительностью более 1 часа возникает эта ошибка каждый раз когда до конца стирки остается приблизительно 40 минут. Новый модуль может быть неработчим, но это бывает крайне редко. Решил что дело именно в модуле потому что подкидывал ещё на 2 машинки Indesit с соответствующей прошивкой. Если не помогает, посчитай, сколько раз мигает индикатор сети при вращении КА. Заводом виробником дається гарантія на бак водонагрівача на 7 років, підкажіть будь-ласка в який сервісний центр мені необхідно звернутися для заміни бака? Если модуль умер,однозначно перешив и разбор полетов дома,так-же как и компов. Восстановить контакты на нагревательном элементе. Внятного ответа от сервисного центра о том, что означает F-08 я не получил. А тэн при этом совершенно ни при чём, учитывая что такой же используется на старых моделях типа W105, на которых такого колличества F08 никогда небыло.
Скачал даташиты на процы,скомпиллил из исходников прогу для работы с "квадратной шиной",и на этом застрял,нет времени. Просьба, если кто оперирует схемой, подскажите плиз, что это? В режиме полоскания все нормально. Проверить целостность проводов от кнопок до разъема модуля. Проблема заключается в следующем: При выборе любой программы с 1 по 11 машинка выполняет лишь стирку полоскание и отжим не работают. а потом начинают одновременно мигать две кнопки - кнопка пуск и таймер отстрочки. Скажите, стоит ли мне платить опять за ремонт а полетела, похоже, электроника. или уж лучше новую машинку купить. Коды F01-F15 применяются на машинах Ariston и Indesit с сушкой.
СМА Аристон,Индезит с модулем EVO 1,EVO2 | Ремонт бытовой техникиТемпература на дисплее +12 а внутри ниже нуля -10 т. Проверил ТЭН, датчик уровня, реле ТЭНа - все исправно. F-03 вылечилось путём разборки и последующего обжатия разъёма на датчике температуры видимо при нагреве ТЭНа там пропадал контакт. Введите название нужной Вам инструкции и нажмите кнопку Искать Инструкция на русском языке к стиральной машине hotpoint ariston Водонагреватель, холодильник, посудомоечная машина, духовой шкаф, котел Hotpoint-Ariston, стиральная машина Ariston Margherita - инструкции к этой и другой технике торговой марки Ariston вы. Это такая пластмассовая коробочка с контактами под клеммы, а снизу к ней подходит резиновая или пластиковая трубочка, которая идет вниз. Бесплатные инструкции на русском языке Быстрый поиск К Вашему вниманию руководство по эксплуатации стиральной машины Hotpoint-Ariston AVTL 83.
А вобще вероятность того что датчик ур-ня барахлит очень высока. Сказали что модуль мертвый умер микропроцессор. заменить его не могут так как их нет, нужно покупать модуль 800грн. Подробнее вообщем об обследовании. Уже лет 9 пользуемся электрической варочной панелью, но последние месяца 4 одна из конфорок самопроизвольно включается! Но вообще не обязательно, проблема может быть и в плате мне попадалось примерно такое же. Не поднимает воду при сливе. Вот и вчера - Индезиту 3 годика, мотор коллекторный, как начинает набирать высокие обороты, так начинает дымить. Ответ: Здравствуйте, вам необходимо оставить заявку на диагностику и ремонт вашей стиральной машины по т.
Стиральной машины Ariston AVTL 83. Получение инструкции. Чтобы скачать инструкцию Ariston AVTL 83.pdf (373.80 kB), введите код, показанный на.
Инструкции по эсплуатации стиральных машин. Ariston ALDS 100EX стиральная машина, инструкция пользователя, на русском, на русском языке · Ariston AVTL 83 стиральная машина, инструкция пользователя, на русском.
Как исправить неисправность стиральной машины Ariston HotPoint AVTL 83
Инструкция ARISTON AVTL 83 стиральная машина - руководство по эксплуатации. Скриншот к файлу: ARISTON AVTL 83.
Instructions for use WASHING MACHINE Contents GB English, 1 GB F ES Franзais, 13 CIS РУССКИЙ, 25 Installation, 2-3 Unpacking and levelling, 2 Electric and water connections, 2-3 The first wash cycle, 3 Technical details, 3 ES Espa сol, 37 IT ES Italiano, 49 GR ЕЛЛЗНЙКБ, 61 Washing machine description, 4-5 Control panel, 4 How to open and shut the drum, 5 Leds, 5 Starting and Programmes, 6 Briefly: how to start a programme, 6 Programme table, 6 Personalisations, 7 Setting the temperature, 7 Setting the spin cycle, 7 Functions, 7 Detergents and laundry, 8 Detergent dispenser, 8 Bleach cycle, 8 Preparing your laundry, 8 Special items, 8 Woolmark Platinum Care, 8 AVTL 83 Precautions and advice, 9 General safety, 9 Disposal, 9 Saving energy and respecting the environment, 9 Care and maintenance, 10 Cutting off the water or electricity supply, 10 Cleaning your appliance, 10 Caring for your appliance door and drum, 10 Cleaning the pump, 10 Checking the water inlet hose, 10 Cleaning the detergent dispenser, 10 Troubleshooting, 11 Service, 12 Before calling for Assistance, 12 1 Installation GB future reference. Should the appliance be sold, transferred or moved, make sure the instruction manual accompanies the washing machine to inform the new owner as to its operation and features. \u0015 Keep this instruction manual in a safe place for \u0015 Read these instructions carefully: they contain vital information on installation, use and safety. Unpacking and levelling Unpacking loosening the adjustable front feet (see figure); the angle of inclination, measured according to the worktop, must not exceed 2°. Levelling your appliance correctly will provide it with stability and avoid any vibrations, noise and shifting during operation. If it is placed on a fitted or loose carpet, adjust the feet in such a way as to allow enough room for ventilation beneath the washing machine. 1. Unpack the washing machine. 2. Check whether the washing machine has been damaged during transport. If this is the case, do not install it and contact your retailer. 3. Remove the four protective screws and the rubber washer with the respective spacer, situated on the rear of the appliance (see figure). 4. Seal the gaps using the plastic plugs provided. 5. Keep all the parts: you will need them again if the washing machine needs to be moved to another location. Warning: should the screws be re-used, make sure you fasten the shorter ones at the top. Electric and water connections Connecting the water inlet hose A 1. Insert seal A into the end of the inlet hose and screw the latter onto a cold water tap with a 3/4 gas threaded mouth (see figure). Before making the connection, allow the water to run freely until it is perfectly clear. 2. Connect the other end of the water inlet hose to the washing machine, screwing it onto the appliance's cold water inlet, situated on the top right-hand side on the rear of the appliance (see figure). \u0015 Packaging materials are not children's toys. Levelling 3. Make sure there are no kinks or bends in the hose. Your machine may make a considerable amount of noise if the two front feet have not been adjusted correctly. 1. Install the washing machine on a flat sturdy floor, without resting it up against walls, furniture cabinets or other. 2. If the floor is not perfectly level, compensate for any unevenness by tightening or \u0015 The water pressure at the tap must be within the values indicated in the Technical details table (on the next page). \u0015 If the water inlet hose is not long enough, contact a specialist store or an authorised serviceman. 2 Connecting the drain hose outdoor environment, not even when the area is sheltered, because it may be very dangerous to leave it exposed to rain and thunderstorms. GB 65 - 100 cm Connect the drain hose, without bending it, to a draining duct or a wall drain situated between 65 and 100 cm from the floor; \u0015 When the washing machine is installed, the main socket must be within easy reach. \u0015 Do not use extensions or multiple sockets. \u0015 The power supply cable must never be bent or dangerously compressed. \u0015 The power supply cable must only be replaced by an authorised serviceman. Warning! The company denies all liability if and when these norms are not respected. underwater. alternatively, place it over the edge of a basin, sink or tub, fastening the duct supplied to the tap (see figure). The free end of the hose should not be The first wash cycle Once the appliance has been installed, and before you use it for the first time, run a wash cycle with detergent and no laundry, setting the 90°C programme without a pre-wash cycle. Technical details \u0015 We advise against the use of hose extensions; in case of absolute need, the extension must have the same diameter as the original hose and must not exceed 150 cm in length. Model AVTL 83 40 cm wide 85 cm high 60 cm deep from 1 to 5 kg Please refer to the technical data plate fixed to the machine. maximum pressure 1 MPa (10 bar) minimum pressure 0.05 MPa (0.5 bar) drum capacity 42 litres up to 800 rpm Dimensions Capacity Electric connection Before plugging the appliance into the mains socket, make sure that: • the socket is earthed and in compliance with the applicable law; • the socket is able to sustain the appliance's maximum power load indicated in the Technical details table (on the right) ; • the supply voltage is included within the values i ndicated on the Technical details table (on the right); • the socket is compatible with the washing machine's plug. If this is not the case, replace the socket or the plug. Electric connections Water connections Spin speed Control programmes according to EN 60456 directive programme 3; temperature 60°C; run with a load of 5 kg. This appliance is compliant with the following European Community Directives: - 89/336/CEE of 03/05/89 (Electromagnetic Compatibility) and subsequent amendments - 2006/95/CE (Low voltage) - 2002/96/CE \u0015 The washing machine should not be installed in an 3 Washing machine description GB Control panel SPIN SPEED knob TEMPERATURE knob ON/OFF key LID LOCKED LED LEDs keys START/RESET key FUNCTION PROGRAMME knob Detergent dispenser to add detergent and fabric softener ( see page 8). LEDs to find out which wash cycle phase is under way. If the Delay Timer function has been set, the time left until the programme starts will be indicated (see page 5). SPIN SPEED knob to set the spin speed or exclude the spin cycle completely (see page 7). FUNCTION keys to select the functions available. The button corresponding to the function selected will remain on. TEMPERATURE knob to set the temperature or the cold wash cycle (see page 7). ON/OFF key to turn the washing machine on and off. START/RESET key to start the programmes or cancel incorrect settings. ON-OFF/LID LOCK led ,to find out whether the washing machine is on (flashing) and if the lid may be opened (see page 5). PROGRAMME knob to set the programmes (see page 6). The knob stays still during the cycle. ON-OFF/LID LOCK led: If this LED is on, the appliance Lid is locked to prevent it from being opened accidentally; to avoid any damages, you must wait for the lamp to flash before you open the Lid. \u0015 The rapid flashing of the ON-OFF/LID LOCK Led together with the flashing of at least one other LED indicates there is an abnormality (see page11 ). 4 How to open and to close the drum A) Opening (Fig. 1). Lift the external lid and open it completely. GB Fig. 1 Fig. 2 B) Then open the drum using both hands as shown in Fig. 2: - press the button indicated by the arrow in Fig. 2 lightly downwards, with one hand firmly resting on the doors to prevent them from suddenly opening and hurting your fingers; - therefore follow the appliance doors along as these unhook and open easily. C) Loading the washing machine. (Fig. 3). D) Shutting (Fig. 4). - close the drum fully by first shutting the front door followed by the rear one; - then ensure the hooks on the front door are perfectly housed within the seat of the rear door; - after the hooks have clicked into position, press both doors lightly downwards to make sure they do not come loose; - finally shut the external lid. Fig. 3 Fig. 4 Leds The LEDS provide important information. This is what they can tell you: Cycle phase under way: During the wash cycle, the LEDs gradually illuminate on to indicate the cycle phase under way: Prewash Wash Rinse Spin cycle Note: during draining, the LED corresponding to the Spin cycle phase will be turned on. Function keys The FUNCTION KEYS also act like LEDS. When a function is selected, the corresponding button is illuminated. If the function selected is incompatible with the programme set, the button will flash and the function will not be enabled. If you set a function that is incompatible with another function you selected previously, only the last one selected will be enabled. 5 Starting and Programmes GB Briefly: starting a programme 1. Switch the washing machine on by pressing button. All the LEDS will light up for a few seconds and the ON-OFF/DOOR LOCK Led will begin to flash. 2. Load your laundry into the washing machine, add the detergent and any fabric softener (see page 8) and shut the appliance door. 3. Set the PROGRAMME knob to the programme required. 4. Set the wash temperature (see page 7). 5. Set the spin speed (see page 7). 6. Start he programme by pressing the START/RESET button. To cancel it, keep the START/RESET button pressed for at least 2 seconds. 7. When the programme is finished, the ON-OFF/ DOOR LOCK Led will flash to indicate that the appliance door can be opened. Take out your laundry and leave the appliance door ajar to allow the drum to dry thoroughly. Turn the washing machine off by pressing button. Programme table Type of fabric and degree of soil Programmes Wash temperat. Detergent Prewash Wash Fabric softener Bleaching Cycle length Description of wash cycle /option (minutes) Bleach Cotton Extremely soiled whit es (sheet s, tableclot hs, etc.) Extremely soiled whit es (sheet s, tableclot hs, etc.) Heavily soiled whit es and fast colours Heavily soiled whit es and fast colours Slightly soiled whit es and delicate colours (shirt s, jumpers, etc.) 1 2 3 4 5 90°C 90°C 60°C 40°C 30°C • • • • • • • • • • • 15 5 Pre-wash, wash cycle, rinse cycles, intermediat e and final spin cycles Wash cycle, rinse cycles, intermediat e and final spin cycles Wash cycle, rinse cycles, intermediat e and final spin cycles Wash cycle, rinse cycles, intermediat e and final spin cycles Wash cycle, rinse cycles, intermediat e and final spin cycles Wash cycle, rinse cycles, anticrease or delicat e spin cycle Wash cycle, rinse cycles, anticrease or delicat e spin cycle Wash cycle, rinse cycles, anticrease or delicat e spin cycle Wash cycle, rinse cycles and delicate spin cycl Wash cycle, rinse cycles and delicate spin cycle Wash cycle, rinse cycles, anticrease or draining cycle Delicate/ Traditional Delicate/ Traditional Delicate/ Traditional Delicate/ Traditional 147 157 96 88 Synthetics Heavily soiled fast colours (baby linen, etc.) Heavily soiled fast colours (baby linen, etc.) Delicat e colours (all types of slightly soiled garment s) Delicat e colours (all types of slightly soiled garment s) 6 7 8 9 60°C 50°C 40°C 30°C • • • • • • • • Delicate Delicate Delicate 97 93 83 33 Delicate Wool Very delicate fabrics (curtains, silk, viscose, etc.) PARTIAL PROGRAMMES Rinse Delicat e rinse cycle Spin cycle Delicat e spin cycle Draining 10 11 40°C 30°C • • • • Delicate 48 55 • • Rinse cycles and spin cycle Rinse cycles, anti-crease or draining Draining and heavy duty spin cycle Draining and delicat e spin cycle Draining Notes For the anti-crease function: see Easy iron, opposite page. The information contained in the table is purely indicative. Special programme Daily 30' (programme 9 for Synthetics) is designed to wash lightly soiled garments in a short amount of time: it only lasts 30 minutes and allows you to save on both time and energy. By setting this programme (9 at 30°C), you can wash different fabrics together (except for woollen and silk items), with a maximum load of 3 kg. We recommend the use of liquid detergent. 6 Personalisations Setting the temperature GB Turn the TEMPERATURE knob to set the wash temperature (see Programme table on page 6). The temperature can be lowered, or even set to a cold wash ( ). Turn the SPIN SPEED knob to set the spin speed for the programme selected. The maximum spin speeds for each programme are as follows: Programmes Maximum spin speed Cottone 800 rpm Synthetics 800 rpm Wool 600 rpm Silk no. The spin speed can be lowered, or the spin cycle can be excluded altogether by selecting symbol The washing machine will automatically prevent you from selecting a spin speed higher than the maximum speed for each programme. Setting the spin speed \u0015 To avoid excessive vibrations, before every spin cycle the machine distributes the load in a uniform manner by continuously rotating the drum at a speed which is slightly faster than the normal washing speed. When, despite repeated attempts, the load is still not evenly distributed, the machine spins at a lower speed than the set frequency. If the load is excessively unbalanced, the machine attempts to distribute it instead of spinning. The balancing attempts may extend the total duration of the cycle, up to a maximum of 10 minutes. Functions To enable a function: 1. press the button corresponding to the desired function, according to the table below; 2. the function is enabled when the corresponding button is illuminated. Note: The rapid flashing of the button indicates that the corresponding function cannot be selected for the programme set. Function Super Wash Ef fect Al l ows f or an i mpeccabl e wash, vi si bl y whi t er t han a st andar d Cl ass A wash. Comments Enabled with pr ogr ammes: Thi s f unct i on i s i ncompat i bl e wi t h t he RAPI D f unct i on. 1, 2, 3, 4, 5, 6, 7, 8 Easy i r on Thi s opt i on reduces t he amount of creasi ng on f abri cs, maki ng t hem easi er t o i ron. When t hi s f unct i on i s set. programmes 6, 7, 8, 11 and Del i cat e r i nse wi l l end wi t h t he l aundr y l ef t t o soak (Ant i -crease) and t he Ri nse cycl e phase LED wi l l f l ash. - t o concl ude t he cycl e, pr ess t he START/RESET but t on; - t o run t he drai ni ng cycl e al one, set t he knob t o t he r el at i ve symbol and pr ess t he START/RESET but t on. All pr ogr ammes except f or 1, 2, 9, 10 and Dr aining. Rapi d Cut s t he durat i on of t he wash cycl e by 30%. I ncr eases t he ef f i ci ency of t he ri nse. Thi s f unct i on i s i ncompat i bl e wi t h t he SUPER WASH f unct i on. Recommended when t he appl i ance has a f ul l l oad or wi t h l arge quant i t i es of det er gent. 1, 2, 3, 4, 5, 6, 7, 8 Rinses 1, 2, 3, 4, 5, 6, 7, 8, and Rinse cycles. Ext ra Ri nse 7 Detergents and laundry GB Detergent dispenser Good washing results also depend on the correct dose of detergent: adding too much detergent won't necessarily make for a more efficient wash, and may in fact cause build up on the interior of your appliance and even pollute the environment. Open up the detergent dispenser and pour in the detergent and fabric softener, as follows. compartment 1: Detergent for pre-wash compartment 2: Detergent for the wash cycle (powder or liquid) It is recommended that you place liquid detergent directly into the compartment using the appropriate dosing cup. compartment 3: Additives (softener, etc.) When pouring the softener in compartment 3, avoid exceeding the "max" level indicated. The softener is added automatically into the machine during the last wash. At the end of the wash programme, some water will be left in compartment 3. This is used for the inlet of denser fabric softeners into the machine, i.e. to dilute the more concentrated softeners. Should more than a normal amount of water remain in compartment 3, this means the emptying device is blocked. For cleaning instructions, see page 10. compartment 4: Bleach form too much foam. Preparing your laundry • Divide your laundry according to: - the type of fabric/the symbol on the label. - the colours: separate coloured garments from whites. • Empty all pockets and check for loose buttons. • Do not exceed the weight limits stated below, which refer to the weight when dry: Sturdy fabrics: max 5 kg Synthetic fabrics: max 2.5 kg Delicate fabrics: max 2 kg Wool: max 1 kg How much does your laundry weigh? 1 sheet 400-500 g 1 pillow case 150-200 g 1 tablecloth 400-500 g 1 bathrobe 900-1,200 g 1 towel 150-250 g Special items Curtains: fold curtains and place them in a pillow case or mesh bag. Wash them separately without exceeding half the appliance load. Use programme 11 which excludes the spin cycle automatically. Quilted coats and windbreakers: if they are padded with goose or duck down, they can be machine-washed. Turn the garments inside out and load a maximum of 2-3 kg, repeating the rinse cycle once or twice and using the delicate spin cycle. Trainers: remove any mud. They can be washed together with jeans and other tough garments, but not with whites. Wool: for best results, use a specific detergent, taking care not to exceed a load of 1 kg. \u0015 Do not use hand wash detergent because it may Bleach cycle Traditional bleach should be used on sturdy white fabrics, and delicate bleach for coloured fabrics, synthetics and for wool. When pouring in the bleach, be careful not to exceed the "max" level indicated on compartment 4. To run the bleach cycle alone, pour the bleach into. compartment 4 and set the Extra Rinse option Woolmark Platinum Care As gentle as a hand wash. Hotpoint Ariston sets a new standard of superior performance that has been endorsed by The Woolmark Company with the prestigious Woolmark Platinum Care brand. Look for the Woolmark Platinum Care logo on the washing machine to ensure you can safely and effectively wash wool garments labelled as "hand wash" (M.0303): garments, Set programme 10 for all "Hand wash" using the appropriate detergent (max load 1 kg). 8 Precautions and advice \u0015 The washing machine was designed and built in compliance with the applicable international safety regulations. The following information is provided for your safety and should consequently be read carefully. separately in order to optimise the recovery and recycling of the materials they contain and reduce the impact on human health and the environment. The crossed out "wheeled bin" symbol on the product reminds you of your obligation, that when you dispose of the appliance it must be separately collected. Consumers should contact their local authority or retailer for information concerning the correct disposal of their old appliance. • Disposing of an old washing machine: before scrapping your appliance, cut the power supply cable and remove the appliance door. GB General safety • This appliance has been designed for nonprofessional, household use and its functions must not be changed. • This washing machine should only be used by adults and in accordance with the instructions provided in this manual. • Never touch the washing machine when barefoot or with wet or damp hands or feet. • Do not pull on the power supply cable to unplug the appliance from the electricity socket. Pull the plug out yourself. • Do not open the detergent dispenser while the appliance is in operation. • Do not touch the drain water as it could reach very high temperatures. • Never force the washing machine door: this could damage the safety lock mechanism designed to prevent any accidental openings. • In the event of a malfunction, do not under any circumstances touch internal parts in order to attempt repairs. • Always keep children well away from the appliance while in operation. • The appliance door tends to get quite hot during the wash cycle. • Should it have to be moved, proceed with the help of two or three people and handle it with the utmost care. Never try to do this alone, because the appliance is very heavy. • Before loading your laundry into the washing machine, make sure the drum is empty. Saving energy and respecting the environment Environmentally-friendly technology If you only see a little water through your appliance door, this is because thanks to the latest technology, your washing machine only needs less than half the amount of water to get the best results: an objective reached to respect the environment. Saving on detergent, water, energy and time • To avoid wasting resources, the washing machine should be used with a full load. A full load instead of two half loads allows you to save up to 50% on energy. • The pre-wash cycle is only necessary on extremely soiled garments. Avoiding it will save on detergent, time, water and between 5 and 15% energy. • Treating stains with a stain remover or leaving them to soak before washing will cut down the need to wash them at high temperatures. A programme at 60°C instead of 90°C or one at 40°C instead of 60°C will save up to 50% on energy. • Use the correct quantity of detergent depending on the water hardness, how soiled the garments are and the amount of laundry you have, to avoid wastage and to protect the environment: despite being biodegradable, detergents do contain ingredients that alter the natural balance of the environment. In addition, avoid using fabric softener as much as possible. • If your laundry has to be dried in a tumble dryer, select a high spin speed. Having the least water possible in your laundry will save you time and energy in the drying process. Disposal • Disposing of the packaging material: observe local regulations, so the packaging can be re-used. • Disposal of old electrical appliances The European Directive 2002/96/EC on Waste Electrical and Electronic Equipment (WEEE), requires that old household electrical appliances must not be disposed of in the normal unsorted municipal waste stream. Old appliances must be collected 9 Care and maintenance GB Cutting off the water or electricity supply • Turn off the water tap after every wash. This will limit the wear of your appliance's water system and also prevent leaks. • Unplug your appliance when cleaning it and during all maintenance operations. \u0015 Make sure the wash cycle has ended and unplug the appliance. To recover any objects that have fallen into the prechamber: 1. remove the plinth at the bottom on the front side of the washing machine by pulling from the side with your hands (see diagram); (see figure); 2. unscrew the lid rotating it anticlockwise (see figure): a little water may trickle out. This is perfectly normal; 3. clean the interior thoroughly; 4. screw the lid back on; 5. reposition the panel, making sure the hooks are securely in place before you push it onto the appliance. Cleaning your appliance The exterior and rubber parts of your appliance can be cleaned with a soft cloth soaked in lukewarm soapy water. Do not use solvents or abrasives. Cleaning the detergent dispenser Remove the dispenser by raising it and pulling it out (see figure). Wash it under running water; this operation should be repeated frequently. Caring for your appliance door and drum • Always leave the appliance door ajar to prevent unpleasant odours from forming. Cleaning the pump The washing machine is fitted with a self-cleaning pump that does not require any maintenance. Sometimes, small items (such as coins or buttons) may fall into the pre-chamber that protects the pump, situated in the lower part of the same. Checking the water inlet hose Check the water inlet hose at least once a year. If you see any cracks, replace it immediately: during the wash cycles, water pressure is very strong and a cracked hose could easily split open. \u0015 Never use hoses that have already been used. How to clean the detergent dispenser Disassembly: Press lightly on the large button on the front of the detergent dispenser and pull it upwards (fig. 1). Cleaning: Then clean the dispenser under a tap (fig. 3) using an old toothbrush and, once the pair of siphons inserted in the top of compartments 1 and 2 (fig. 4) have been pulled out, check whether the same are not clogged and then rinse them. Reassembly: Do not forget to reinsert the pair of siphons into the special housings and then to replace the dispenser into its seat, clicking it into place (fig. 4, 2 and 1). Fig. 1 10 Fig. 2 Fig. 3 Fig. 4 Troubleshooting Your washing machine could fail to work. Before calling for Assistance (see page 12), make sure the problem can't easily be solved by consulting the following list. GB Problem The washing machine won't start. The wash cycle won't start. Possible causes/Solution: • The appliance is not plugged into the socket, or not enough to make contact. • There has been a power failure. • • • • • • • • • • The appliance Lid is not shut properly. The Lid locked Led flashes. button has not been pressed. The The START/RESET button has not been pressed. The water tap is not turned on. The water inlet hose is not connected to the tap. The hose is bent. The water tap is not turned on. There is a water shortage. The water pressure is insufficient. The START/RESET button has not been pressed. The washing machine fails to load water. The washing machine continuously loads and unloads water. • The drain hose is not fitted between 65 and 100 cm from the floor (see page 3). • The free end of the hose is underwater (see page 3). • The wall drainage system doesn't have a breather pipe. If the problem persists even after these checks, turn off the water tap, switch the appliance off and call for Assistance. If the dwelling is on one of the upper floors of a building, there may be drain trap problems causing the washing machine to load and unload water continuously. In order to avoid such an inconvenience, special anti-drain trap valves are available in shops. • The programme does not foresee the draining: some programmes require enabling the draining manually (see page 6). • The Easy iron option is enabled: to complete the programme, press the START/RESET button (see page 7). • The drain hose is bent (see page 3). • The drain duct is clogged. • When the machine is installed, the locking screws for the oscillating assembly are still in place. Remove the screws (see page 2). • The washing machine is not level (see page 2). • The washing machine is closed in between furniture cabinets and the wall (see page 2). • The water inlet hose is not screwed on correctly (see page 2). • The detergent dispenser is obstructed (to clean it, see page 10). • The drain hose is not secured properly (see page 3). • Switch off the machine and unplug the appliance; wait for approximately 1 minute then switch it on again. If the problem persists, contact Assistance. • The detergent is not suitable for machine washing (it should bear the definition "for washing machines" or "hand and machine wash", or the like). • You used too much detergent. The washing machine does not drain or spin. The washing machine vibrates too much during the spin cycle. The washing machine leaks. The ON-OFF/DOOR LOCK Led flashes rapidly at the same time as at least one other LED. There is too much foam. 11 Service GB Before calling for Assistance: • Check whether you can solve the problem on your own (see page 11); • Restart the programme to check whether the problem has been solved; • If this is not the case, contact an authorised Technical Service Centre on the telephone number provided on the guarantee certificate. \u0015 If the machine has been installed or used incorrectly, you may be charged for the maintenance callout \u0015 Always request the assistance of authorised servicemen. Notify the operator of: • the type of problem; • the appliance model (Mod.); • the serial number (S/N); This information can be found on the data plate situated on the rear of the washing machine. service. Service 12 Mode d'emploi LAVE-LINGE TOP LOADER Sommaire Installation, 14-15 Dйballage et mise а niveau, 14 Raccordements hydrauliques et йlectriques, 14-15 Premier cycle de lavage, 15 Caractйristiques techniques, 15 F F Franзais Description du lave-linge, 16-17 Bandeau de commandes, 16 Comment ouvrir et fermer le tambour, 17 Ecran, 17 Mise en marche et Programmes, 18 En bref: dйmarrage d'un programme, 18 Tableau des programmes, 18 Personnalisations, 19 AVTL 83 Rйglage de la tempйrature, 19 Rйglage de l'essorage, 19 Options, 19 Produits lessiviels et linge, 20 Tiroir а produits lessiviels, 20 Cycle blanchissage, 20 Triage du linge, 20 Piиces de linge particuliиres, 20 Woolmark Platinum Care, 20 Prйcautions et conseils, 21 Sйcuritй gйnйrale, 21 Mise au rebut, 21 Economies et respect de l'environnement, 21 Entretien et soin, 22 Coupure de l'arrivйe d'eau et de courant, 22 Nettoyage du lave-linge, 22 Entretien du couvercle et du tambour, 22 Nettoyage de la pompe, 22 Nettoyage du tiroir а produits lessiviels, 22 Contrфle du tuyau d'arrivйe de l'eau, 22 Anomalies et remиdes, 23 Assistance, 24 Avant d'appeler le service aprиs-vente, 24 13 Installation F \u0015 Conservez ce mode d'emploi pour pouvoir le consulter а tout moment. En cas de vente, de cession ou de dйmйnagement, veillez а ce qu'il suive toujours le lave-linge pour que son nouveau propriйtaire soit informй sur son mode de fonctionnement et puisse profiter des conseils correspondants. \u0015 Lisez attentivement les instructions: elles fournissent d'importantes informations sur l'installation, l'utilisation et la sйcuritй. naison, mesurй sur le plan de travail, ne doit pas dйpasser 2°. Une bonne mise а niveau garantit la stabilitй de la machine et йvite qu'il y ait des vibrations, du bruit et des dйplacements en cours de fonctionnement. Si la machine est posйe sur de la moquette ou un tapis, rйglez les petits pieds de maniиre а ce qu'il y ait suffisamment d'espace pour assurer une bonne ventilation. Dйballage et mise а niveau Dйballage: enlever les 4 vis Raccordements hydrauliques et йlectriques Raccordement du tuyau d'arrivйe de l'eau 1. Dйballez le lave-linge. 2. Contrфlez que le lave-linge n'a pas йtй endommagй pendant le transport. S'il est abоmй, ne le raccordez pas et contactez votre revendeur. 3. Enlevez les quatre vis de protection pour le transport, le caoutchouc et la cale, placйs dans la partie arriиre (voir figure). A 1. Montez le joint A sur l'extrйmitй du tuyau d'alimentation et vissez-le а un robinet d'eau froide а embout filetй 3/ 4 gaz (voir figure). Faites couler l'eau jusqu'а ce qu'elle soit limpide et sans impuretйs avant de raccorder. 2. Raccordez le tuyau d'alimentation au lave-linge en le vissant а la prise d'eau prйvue, dans la partie arriиre en haut а droite (voir figure). 3. Faites attention а ce que le tuyau ne soit ni pliй ni йcrasй. 4. Bouchez les trous а l'aide des bouchons plastique fournis. 5. Conservez bien toutes ces piиces: il faudra les remonter en cas de transport du lave-linge. \u0015 Attention: en cas de rйutilisation, les vis plus doivent кtre montйes dessus. Mise а niveau courtes \u0015 Les emballages ne sont pas des jouets pour enfants. Votre appareil peut s’avйrer bruyant si vous n’avez pas bien rйglй ses deux pieds avant. 1. Installez le lave-linge sur un sol plat et rigide, sans l'appuyer contre des murs, des meubles ou autre. 2. Si le sol n'est pas parfaitement horizontal, vissez ou dйvissez les petits pieds avant (voir figure) pour niveler l'appareil; son angle d'incli- \u0015 La pression de l'eau doit кtre comprise entre les valeurs indiquйes dans le tableau des Caractйristiques techniques (voir page ci-contre). adressez-vous а un magasin spйcialisй ou а un technicien agrйй. \u0015 Si la longueur du tuyau d'alimentation ne suffit pas, 14 Raccordement du tuyau de vidange Raccordez le tuyau d'йvacuation, sans le plier, а un conduit d'йvacuation ou а une йvacuation murale placйs а une distance du sol comprise entre 65 et 100 cm; F \u0015 N'utilisez ni rallonges ni prises multiples. \u0015 Le cвble ne doit кtre ni pliй ni йcrasй. \u0015 Le cвble d'alimentation ne doit кtre remplacй que par des techniciens agrййs. Attention! Nous dйclinons toute responsabilitй en cas de non respect des normes йnumйrйes ci-dessus. 65 - 100 cm ou bien accrochez-le а un йvier ou а une baignoire, dans ce cas, fixez le support en plastique fourni avec l'appareil au robinet (voir figure). L'extrйmitй libre du tuyau d'йvacuation ne doit pas кtre plongйe dans l'eau. Premier cycle de lavage Avant la premiиre utilisation de la machine, effectuez un cycle de lavage avec un produit lessiviel mais sans linge et sйlectionnez le programme а 90°C sans prйlavage. \u0015 L'utilisation de tuyaux de rallonge est absolument dйconseillйe, si vous ne pouvez vraiment pas faire autrement vous devrez utiliser un tuyau de mкme diamиtre et de longueur maximum de 150 cm. Caractйristiques techniques Modиle AVTL 83 largeur 40 cm hauteur 85 cm profondeur 60 cm de 1 а 5 kg Voir la plaque signalйtique appliquйe sur la machine. pression maximale 1 MPa (10 bar) pression minimale 0,05 MPa (0,5 bar) capacitй du tambour 42 litres jusqu'а 800 tours minute programme 3; tempйrature 60°C; effectuй avec une charge de 5 kg. Cet appareil est conforme aux Directives Communautaires suivantes: - 89/336/CEE du 03/05/89 (Compatibilitй йlectromagnйtique) et modifications suivantes - 2006/95/CE (Basse Tension) - 2002/96/CE Branchement йlectrique Avant de brancher la fiche dans la prise de courant, contrфlez que: • la prise dispose de mise а la terre et est conforme aux normes; • la prise est bien apte а supporter la puissance maximale de la machine indiquйe dans le tableau des Carcatйristiques techniques (voir ci-contre); • la tension d'alimentation est bien comprise entre les valeurs figurant dans le tableau des Caractйristiques techniques (voir ci-contre); • la prise est bien compatible avec la fiche du lave-linge. Autrement, remplacez la prise ou la fiche. Dimensions Capacitй Raccordements йlectriques Raccordements hydrauliques Vitesse d'essorage Programmes de contrфle selon la norme EN 60456 \u0015 Votre lave-linge ne doit pas кtre installй dehors, mкme а l'abri, car il est trиs dangereux de le laisser exposй а la pluie et aux orages. кtre facilement accessible. \u0015 Aprиs installation du lave-linge, la prise de courant doit 15 Description du lave-linge F Bandeau de commandes Bouton ESSORAGE Bouton TEMPЙRATURE Touche MISE EN MARCHE/ARRET Voyant COUVERCLE VERROUILLЙ Voyants Touches Touche START/RESET Bouton FONCTION PROGRAMMES Tiroir а produits lessiviels pour charger produits lessiviels et additifs (voir page 20). Voyants pour suivre le stade d'avancement du programme de lavage. Si la fonction Delay Timer (dйpart diffйrй) a йtй sйlectionnйe, ils indiquent le temps restant avant le dйmarrage du programme (voir page 17). Bouton ESSORAGE: rйglage de la vitesse d'essorage ou exclusion (voir page 19). Bouton TEMPЙRATURE: modification de la tempйrature de lavage de 90° a O° (voir page 19). Touches FONCTION pour sйlectionner les fonctions disponibles. La touche correspondant а la fonction sйlectionnйe restera allumйe. Touche MISE EN MARCHE/ARRET: mise en marche ou arrкt du lave-linge. (voir page 18). Touche START/RESET: dйmarrage des programmes ou annulation (en cas d'erreur). Voyant MARCHE/COUVERCLE VERROUILLE pour comprendre si le lave-linge est allumй (clignotant) et si le couvercle peut кtre ouvert (fixe) (voir page 17). Bouton PROGRAMMES pour sйlectionner les programmes (voir page 18). Pendant le programme, le bouton ne bouge pas. Voyant MARCHE/COUVERCLE VERROUILLE: Le symbole йclairй indique que le couvercle est verrouillй pour йviter toute ouverture accidentelle; attendez que le voyant clignote avant de l'ouvrir. \u0015 Le clignotement rapide du voyant MARCHE/COUVERCLE VERROUILLE en mкme temps qu'un autre signale une anomalie (voir page 18). 16 Comment ouvrir et fermer le tambour A) Ouvrez le couvercle. (Fig. 1). Soulevez le Couvercle externe et ouvrez le complиtement; B)\u0014 Ouvrez ensuite les Portes du tambour а l’aide F de vos deux mains comme indiquй sur la Fig. 2): \u0014\u0014\u0014\u0014 • appuyez sur la touche indiquйe par la flиche sur la Fig. 2) et tout en appuyant lйgиrement vers le bas posez une main pour йviter que les portes ne vous fassent mal aux adoigts en s’ouvrant soudainement; • accompagnez dans leur mouvements les portes qui se dйcrocheront et s’ouvriront facilement. C) INTRODUISEZ LE LINGE. (Fig. 3). D) FERMEZ. (Fig. 4). • refermez bien le tambour en baissant d’abord la porte antйrieure et posez ensuite la porte postйrieure; • faites attention а parfaitement positionner les crochets de la porte antйrieure dans leur siиge dans la porte postйrieure; • vous entendrez un “ clac ” qui confirmera la bonne fixation; appuyez alors lйgиrement vers le bas sur les deux portes qui ne doivent pas se dйcrocher; • fermez enfin le couvercle externe. Fig. 1 Fig. 2 Fig. 3 Fig. 4 Voyants Les voyants fournissent des informations importantes. Voilа ce qu'ils signalent: Phases en cours: Pendant le cycle de lavage, les voyants s'allument progressivement pour indiquer son stade d'avancement: Prйlavage Lavage Rinзage Essorage Remarque: pendant la phase de vidange, le voyant correspondant а la phase Essorage s'allume. Touches fonction La sйlection d'une fonction entraоne l'allumage du voyant correspondant. Si la fonction sйlectionnйe est incompatible avec le programme sйlectionnй, la touche clignote et la fonction n'est pas activйe. En cas de sйlection d'une fonction incompatible avec une autre prйcйdemment sйlectionnйe, la seule а кtre activйe sera la derniиre validйe. 17 Mise en marche et Programmes F En bref: dйmarrage d'un programme 1. Pour allumer le lave-linge appuyez sur la touche. Tous les voyants s'allument pendant quelques secondes puis s'йteignent et le voyant ALLUMAGE/ COUVERCLE VERROUILLE commence а clignoter. 2. Chargez le lave-linge, versez le produit lessiviel et les additifs (voir page 20) et fermez les portes et le couvercle. 3. Sйlectionnez а l'aide du bouton PROGRAMMES le programme dйsirй. 4. Sйlectionnez la tempйrature de lavage (voir page 19). 5. Sйlectionnez la vitesse d'essorage (voir page 19). 6. Appuyez sur la touche START/RESET pour lancer le programme. Pour annuler, poussez sur la touche START/RESET pendant 2 secondes au moins. 7. A la fin du programme de lavage, le voyant ALLUMAGE/ COUVERCLE VERROUILLE clignote pour indiquer que le couvercle peut кtre ouvert. Sortez le linge et laissez le couvercle entrouvert pour faire sйcher le tambour. Eteignez le lave-linge en appuyant sur la touche. Tableau des programmes Nature des tissus et degrй de salissure Programmes Temp. lavage Lessive prйlav. lavage. Assouplissant Option Antitвches/ Eau de Javel Durйe du Description du cycle de lavage cycle (minutes) Coton Blancs extrкmement sales (draps, nappes, etc.) Blancs extrкmement sales (draps, nappes, etc.) Blancs et couleurs rйsistantes trиs sales Blancs peu sales et couleurs dйlicates (chemises, pulls, etc.) Couleurs dйlicates peu sales 1 2 3 4 5 90° C 90° C 60° C 40° C 30° C • • • • • • • • • • • Dйlicate/ Traditionnelle Dйlicate/ Traditionnelle Dйlicate/ Traditionnelle Dйlicate/ Traditionnelle Dйlicate Dйlicate Dйlicate 155 147 157 96 88 Prйlavage, lavage, rinзages, essorages intermйdiaires et finaux Lavage, rinзages, essorages intermйdiaires et finaux Lavage, rinзages, essorages intermйdiaires et finaux Lavage, rinзages, essorages intermйdiaires et finaux Lavage, rinзages, essorages intermйdiaires et finaux Lavage, rinзages, antifroissement ou essorage dйlicat Lavage, rinзages, antifroissement ou essorage dйlicat Lavage, rinзages, antifroissement ou essorage dйlicat Lavage, rinзages et essorage dйlicat Lavage, rinзages et essorage dйlicat Lavage, rinзages, antifroissement ou vidange Rinзages et essorage Rinзages, anti-froissement ou vidange Vidange et essorage йnergique Vidange et essorage dйlicat Vidange Synthйtiques Couleurs rйsistantes trиs sales (linge de bйbй, etc.) Couleurs rйsistantes trиs sales (linge de bйbй, etc.) Couleurs dйlicates (linge en tout genre lйgиrement sale) Couleurs dйlicates (linge en tout genre lйgиrement sale) 6 7 8 9 60° C 50° C 40° C 30° C • • • • • • • • 97 93 83 33 Dйlicats Laine Tissus particuliиrement dйlicats (rideaux, soie, viscose, etc.) PROGRAMMES PARTIAUX Rinзage Rinзage dйlicat Essorage Essorage dйlicat Vidange • • 10 11 40° C 30° C • • • • Dйlicate 48 55 Remarque Pour la fonction anti-froissement: voir Repassage facile, page ci-contre. Les donnйes reportйes dans le tableau sont а titre indicatif. Programme spйcial Quotidien 30' (programme 9 pour Synthйtiques) spйcialement conзu pour laver du linge peu sale en un rien de temps: il ne dure que 30 minutes et permet ainsi de faire des йconomies d'йnergie et de temps. Choisissez le programme (9 а 30°C), vous pourrez laver ensemble des textiles diffйrents (sauf laine et soie) en ne dйpassant pas 3 kg de charge. Nous vous conseillons d'utiliser des lessives liquides. 18 Personnalisations Sйlection de la tempйrature Tournez le bouton TEMPERATURE pour sйlectionner la tempйrature de lavage (voir Tableau des programmes page 18). Vous pouvez rйduire la tempйrature jusqu'au lavage а froid ( ). F Sйlection de l'essorage Tournez le bouton ESSORAGE pour sйlectionner la vitesse d'essorage du programme sйlectionnй. Les vitesses maximales prйvues pour les programmes sont: Programmes Coton Synthйtiques Laine Soie Vitesse maximale 800 tours minute 800 tours minute 600 tours minute no Vous pouvez rйduire la vitesse d'essorage ou bien mкme supprimer ce dernier en sйlectionnant le symbole. La machine interdira automatiquement tout essorage а une vitesse supйrieure а la vitesse maximale prйvue pour chaque programme. \u0015 Pour йviter des vibrations excessives, avant toute phase d'essorage, l'appareil imprime au tambour une sйrie de rotations continues а une vitesse lйgиrement supйrieure а la vitesse de lavage pour distribuer le linge de faзon uniforme. Si, malgrй plusieurs tentatives, le linge n'est pas parfaitement rйparti distribuй, l'appareil effectue l'essorage а une vitesse infйrieure а la vitesse prйvue. En cas de dйsйquilibre excessif, l'appareil procиde а la rйpartition distribution du linge au lieu de l'essorage. Les tentatives йventuelles d'йquilibrage peuvent prolonger la durйe totale du cycle de 10 minutes maximum. Fonctions Les diffйrentes fonctions de lavage prйvues par le lave-linge permettent d'obtenir la propretй et le blanc souhaitйs. Pour activer les fonctions: 1. appuyez sur la touche correspondant а la fonction dйsirйe, d'aprиs le tableau ci-dessous; 2. l'allumage de la touche correspondante signale que la fonction est activйe. Remarque: Le clignotement rapide de la touche signale que la fonction correspondante n'est pas disponible pour le programme sйlectionnй. Fonctions E ffe t M od e d 'em p loi Activйe avec les programmes: 1, 2, 3, 4, 5, 6, 7, 8. To u s s a u f 1, 2, 9, 10, V id a n g e. S upe r La va ge P o u r o b te n ir u n lin g e d 'u n e p ro p re tй im p ec ca b le. vis ib leb lem en t p lu s b la n c p ar rap p o rt au s tan d a rd d e la vag e d e la C la s s e A. E lle e s t in c o m p a t ib le a v e c l' o p t io n P E U S A L E. R e pa s s a ge P o u r m o in s f r o is s e r le s t is s u s e t fa c ile s im p lif ie r le u r rep as s age. S i c e t t e f o n c t io n e s t s й le c t io n n й e. le s p ro g ra m m e s 6. 7. 8. 1 1 s 'a rrк t e ro n t e n la is s a n t le lin g e t re m p e r d a n s l'e a u (A n t i-fro is s e m e n t ) e t le vo y a n t d e la p h a s e R in з a g e se m e t t ra а c lig n o t e r: - p o u r c o m p lй t e r le c y c le a p p u y e z s u r la t o u c h e S TA R T /R E S E T; - p o u r n 'e ff e c t u e r q u e la v id a n g e a m e n e z le b o u t o n s u r le s y m b o le c o rre s p o n d a n t e t a p p u y e z s u r la t o u c h e S TA R T /R E S E T P e u s a le P o u r r й d u ir e d e 3 0 % e n v ir o n la d u r й e d u c y c le d e la v a g e. P o u r au g m en ter l'e f f ic a c it й d u r in з a g e. E lle e s t in c o m p a t ib le a v e c l' o p t io n S U P E R L A V A G E. 1, 2, 3, 4, 5, 6, 7, 8 R in з a g e s R in з a ge plu s U t ilis a t io n c o n s e illй e e n c a s d e p le in e c h a r g e o u d e d o s e s й le v й e s d e p r o d u it le s s iv ie l. 1, 2, 3, 4, 5, 6, 7, 8 R in з a g e s. 19 Produits lessiviels et linge F Tiroir а produits lessiviels Un bon rйsultat de lavage dйpend aussi d'un bon dosage de produit lessiviel: un excиs de lessive ne lave pas mieux, il incruste l'intйrieur de votre lave-linge et pollue l'environnement. Sortez le tiroir а produits lessiviels et versez la lessive ou l'additif comme suit. bac 1: Lessive prйlavage (en poudre) bac 2: Lessive lavage (en poudre ou liquide) En cas d'utilisation de lessive liquide, il est conseillй d'introduire la boule doseuse directement dans la cuve. bac 3: Additifs (adoucissant, etc.) L'assouplissant ne doit pas dйborder de la grille (max). Le lave-linge prйlиve automatiquement l’assouplissant lors du dernier rinзage. A la fin du programme de lavage il reste dans le bac 3 un rйsidu d’eau. Cette eau sert au prйlиvement des assouplissants trиs denses ou а dissoudre les assouplissants concentrйs. Si dans le bac 3 il reste un peu plus d’eau que d’habitude, cela signifie que le dispositif de vidange est bouchй et empкche l’effet aspirant du dispositif. bac 4: Eau de javel Triage du linge • Triez correctement votre linge d'aprиs: - le type de textile / le symbole sur l'йtiquette. - les couleurs: sйparez le linge colorй du blanc. • Videz les poches et contrфlez les boutons. • Ne dйpassez pas les valeurs indiquйes correspondant au poids de linge sec: Textiles rйsistants: 5 kg max. Textiles synthйtiques: 2,5 kg max. Textiles dйlicats: 2 kg max. Laine: 1 kg max. Combien pиse le linge. 1 1 1 1 1 drap 400-500 g taie d'oreiller 150-200 g nappe 400-500 g peignoir 900-1.200 g serviette йponge 150-250 g Piиces de linge particuliиres Rideaux: pliez-les bien et glissez-les dans une taie d'oreiller ou dans un sac genre filet. Lavez-les seuls sans dйpasser la demi-charge. Sйlectionnez le programme 11 qui supprime automatiquement l'essorage. Doudounes et anoraks: s'ils sont en duvet d'oie ou de canard, ils peuvent кtre lavйs а la machine. Lavez les vкtements sur l’envers. La charge ne doit pas excйder 2-3 kg. Prйvoyez 2, voire 3 rinзages et un essorage lйger. Chaussures de tennis: dйbarrassez-les de la boue. Lavezles en mкme temps que jeans et vкtements rйsistants, jamais avec du linge blanc. Laine: pour obtenir d'excellents rйsultats utilisez un produit lessiviel spйcial et ne dйpassez pas une charge de 1 kg. \u0015 N'utilisez pas de lessives pour lavage а la main, elles gйnиrent trop de mousse. Cycle blanchissage N'utilisez de l'eau de Javel traditionnelle que pour les tissus blancs rйsistants et des dйtachants dйlicats pour les couleurs, les synthйtiques et la laine. Lorsque vous versez l'eau de Javel, attention а ne pas dйpasser le niveau "max" indiquй sur le bac 4 (voir figure). Si vous ne voulez que blanchir, versez l'eau de Javel dans le bac supplйmentaire 4 et enfin sйlectionnez l’ option Rinзage. plus Woolmark Platinum Care Dйlicat comme le lavage а la main. Ariston a introduit un nouveau standard de performances supйrieures, reconnu par The Woolmark Company qui lui a attribuй le prestigieux label Woolmark Platinum Care. Si le logo Woolmark Platinum Care est appliquй sur votre lave-linge, vous pouvez laver avec d'excellents rйsultats vos vкtements en laine portant l'йtiquette "laver а la main" (M.0303): Sйlectionnez le programme 10 pour tous les vкtements portant et utilisez un produit lessiviel l'йtiquette "Laver а la main" spйcial, (charge max 1 Kg). 20 Prйcautions et conseils F \u0015 Ce lave-linge a йtй conзu et fabriquй conformйment aux normes internationales de sйcuritй. Ces avertissements sont fournis pour des raisons de sйcuritй, lisez-les attentivement. Sйcuritй gйnйrale • Cet appareil a йtй conзu pour une utilisation domestique, non professionnelle et ses fonctions ne doivent pas кtre altйrйes. • Ce lave-linge ne doit кtre utilisй que par des adultes en suivant les instructions reportйes dans ce mode d'emploi. • N’utilisez pas l’appareil si vous кtes pieds nus. ne touchez jamais l’appareil si vous avez les pieds ou les mains humides. • Ne tirez jamais sur le cвble pour dйbrancher la fiche de la prise de courant. • Ne touchez pas а l'eau de vidange, elle peut atteindre des tempйratures trиs йlevйes. • Ne forcez pas pour ouvrir le couvercle: le verrouillage de sйcuritй qui protиge contre les ouvertures accidentelles pourrait s'endommager. • En cas de panne, n'essayez en aucun cas d'accйder aux mйcanismes internes pour tenter de la rйparer. • Veillez а ce que les enfants ne s'approchent pas de la machine pendant son fonctionnement. • Deux ou trois personnes sont nйcessaires pour la dйplacer en faisant trиs attention. Ne jamais la dйplacer seul car la machine est trиs lourde. • Avant d'introduire votre linge, contrфlez si le tambour est bien vide. appareils usagйs doivent кtre collectйs sйparйment afin d'optimiser le taux de rйcupйration et le recyclage des matйriaux qui les composent et rйduire l'impact sur la santй humaine et l'environnement. Le symbole de la poubelle barrйe est apposйe sur tous les produits pour rappeler les obligations de collecte sйparйe. Les consommateurs devront contacter les autoritйs locales ou leur revendeur concernant la dйmarche а suivre pour l'enlиvement de leur vieil appareil. Economies et respect de l'environnement Economie de produit lessiviel, d'eau, d'йlectricitй et de temps • Pour ne pas gaspiller de ressources, utilisez le lave-linge а sa charge maximale. Mieux vaut une pleine charge que deux demies, vous йconomiserez jusqu'а 50% d'йlectricitй. • Un prйlavage n'est nйcessaire qu'en cas de linge trиs sale. S'en passer permet de faire des йconomies de produit lessiviel, de temps, d'eau et entre 5 et 15% d'йlectricitй. • Si vous traitez les taches avec un produit dйtachant ou si vous les laissez tremper avant de les laver, vous йviterez d'avoir а laver а de hautes tempйratures. Un programme а 60°C au lieu de 90°C ou un а 40°C au lieu de 60°C, fait йconomiser jusqu'а 50% d'йlectricitй. • Bien doser la quantitй de produit lessiviel en fonction de la duretй de l'eau, du degrй de salissure et de la quantitй de linge а laver йvite les gaspillages et protиge l'environnement: bien que biodйgradables, les produits lessiviels contiennent des йlйments qui altиrent l'йquilibre de la nature. Evitez le plus possible l'utilisation d'assouplissant. • Si le linge doit кtre sйchй dans un sиche-linge, sйlectionnez une haute vitesse d'essorage. Du linge qui contient moins d'eau fait йcomiser du temps et de l'йlectricitй dans le programme de sйchage. Enlиvement des appareils mйnagers usagйs • Mise au rebut du matйriel d’emballage: se conformer aux rйglementations locales de maniиre а ce que les emballages puissent кtre recyclиs. • La Directive Europйenne 2002/96/EC sur les Dйchets des Equipements Electriques et Electroniques (DEEE), exige que les appareils mйnagers usagйs ne soient pas jetйs dans le flux normal des dйchets municipaux. Les 21 Entretien et soin F Coupure de l'arrivйe d'eau et de courant • Fermez le robinet de l'eau aprиs chaque lavage: vous limiterez ainsi l'usure de l'installation hydraulique de votre lave-linge et йliminerez le danger de fuites. • Dйbranchez la fiche de la prise de courant quand vous nettoyez votre lave-linge et pendant tous vos travaux d'entretien. \u0015 Contrфlez que le cycle de lavage est bien terminй et dйbranchez la fiche. Pour rйcupйrer les objets qui pourraient кtre tombйs dans la prйchambre. 1. dйposez la base а l'avant de votre lave-linge en la saisissant sur les cфtйs et en la tirant des deux mains (voir figure); 2. dйvissez le cou vercle en le faisant tourner dans le sens inverse des aiguilles d'une montre (voir figure): il est normal qu'un peu d'eau s'йcoule; 3. nettoyez soigneusement а l'intйrieur; 4. revissez le couvercle; 5. remontez le panneau en veillant а bien enfiler les crochets dans les fentes prйvues avant de le pousser contre la machine. Nettoyage du lave-linge Pour nettoyer l'extйrieur et les parties en caoutchouc, utilisez un chiffon imbibй d'eau tiиde et de savon. N'utilisez ni solvants ni abrasifs. Nettoyage du tiroir а produits lessiviels Pour sortir le tiroir, soulevez-le et tirez-le vers vous (voir fig.). Lavez-le а l'eau courante, effectuez cette opйration assez souvent. Entretien du couvercle et du tambour • Quand vous n’utilisez pas votre lave-linge, laissez toujours le hublot entrouvert pour йviter la formation de mauvaises odeurs. Nettoyage de la pompe Le lave-linge est йquipй d'une pompe autonettoyante qui n'exige aucune opйration d'entretien. Il peut toutefois arriver que de menus objets (piиces de monnaie, boutons) tombent dans la prйchambre qui protиge la pompe, placйe en bas de cette derniиre. Contrфle du tuyau d'arrivйe de l'eau Contrфlez le tuyau d'alimentation au moins une fois par an. Remplacez-le dиs que vous remarquez des craquиlements et des fissures: les fortes pressions subies pendant le lavage pourraient provoquer des cassures. \u0015 N'utilisez jamais de tuyaux usйs. Comment nettoyer le tiroir а produits lessiviels Dйmontage: Appuyez lйgиrement sur la grosse touche situйe sur la partie antйrieure du tiroir а produits lessiviels et tirez vers le haut (fig. 1). Nettoyage: Nettoyez le tiroir sous le robinet (fig. 3) а l'aide par exemple d'une vieille brosse а dents; tirez sur les deux petits siphons placйs dans la partie supйrieure des bacs 1 et 2 (fig. 4), contrфlez qu'ils ne soient pas bouchйs et rincez-les. N'oubliez pas de replacez les deux petits siphons dans leurs emplacements spйci-aux et remettez enfin le tiroir dans son siиge en le fixant (fig. 4, 2, 1). Remontage: Fig. 1 22 Fig. 2 Fig. 3 Fig. 4 Anomalies et remиdes Il peut arriver que le lave-linge ne fonctionne pas bien. Avant de appelez le Service aprиs-vente (voir page 24), contrфlez s'il ne s'agit pas d'un problиme facile а rйsoudre grвce а la liste suivante. F Anomalies: Le lave-linge ne s'allume pas. Causes / Solutions possibles: • La fiche n'est pas branchйe dans la prise de courant ou mal branchйe. • Il y a une panne de courant. • • • • • • • • • • Le La La Le couvercle n'est pas bien fermй (le voyant Couvercle Verrouillй clignote). n'a pas йtй actionnйe. touche touche START/RESET n'a pas йtй actionnйe. robinet de l'eau n'est pas ouvert. Le cycle de lavage ne dйmarre pas. Il n'y a pas d'arrivйe d'eau. Le tuyau d'arrivйe de l'eau n'est pas raccordй au robinet. Le tuyau est pliй. Le robinet de l'eau n'est pas ouvert. Il y a une coupure d'eau. La pression n'est pas suffisante. La touche START/RESET n'a pas йtй actionnйe. Le lave-linge prend l'eau et vidange continuellement. • le tuyau de vidange n'est pas installй а une distance du sol comprise entre 65 et 100 cm (voir page 15). • L'extrйmitй du tuyau de vidange est plongйe dans l'eau (voir page 15). • L'йvacuation murale n'a pas d'йvent. Si aprиs ces vйrifications, le problиme persiste, fermez le robinet de l'eau, йteignez la machine et appelez le service Assistance. Si vous habitez en йtage dans un immeuble, il peut y avoir des phйnomиnes de siphonnement qui font que votre lave-linge prend et йvacue l'eau continuellement. Pour supprimer cet inconvйnient, vous pouvez trouver dans le commerce des valves spйciales anti-siphonnement. • Le programme ne prйvoit pas de vidange: pour certains programmes, il faut intervenir pour la faire dйmarrer (voir page 18). • L'option Repassage facile est activйe: pour complйter le programme, appuyez sur la touche START/RESET (voir page 19). • Le tuyau de vidange est pliй (voir page 15). • La conduite de l'installation de vidage est bouchйe. • Les vis de fixation du groupe oscillant n’ont pas йtй enlevйes lors de l’installation de l’appareil. Enlevez les vis (voir page 14). • Le lave-linge n'est pas posй а plat (voir page 14). • Le lave-linge est coincй entre des meubles et le mur (voir page 14). • Le tuyau d'arrivйe de l'eau n'est pas bien vissй (voir figure page 14). • Le tiroir а produits lessiviels est bouchй (pour le nettoyer voir pag. 22). • Le tuyau de vidange n'est pas bien fixй (voir page 15). • Eteindre l'appareil et dйbrancher la fiche de la prise de courant, attendre 1 minute environ avant de rallumer. Si l'anomalie persiste, appeler le service d'assistance. • Le produit de lavage utilisй n'est pas une lessive spйciale machine (il faut qu'il y ait l'inscription "pour lave-linge", "main et machine", ou autre semblable). • La quantitй utilisйe est excessive. Votre lave-linge ne vidange pas et n'essore pas. Votre lave-linge vibre beaucoup pendant l'essorage. Le lave-linge a des fuites. Le voyant ALLUMAGE COUVERCLE VERROUILLE clignote rapidement en mкme temps qu'un autre voyant. Il y a un excиs de mousse. 23 Assistance F Avant d'appeler le service aprиs-vente: • Vйrifiez si vous ne pouvez pas rйsoudre vous-mкme le problиme (voir page 23); • Remettez le programme en marche pour contrфler si le dysfonctionnement a disparu; • Autrement, appelez le Service aprиs-vente de votre revendeur; \u0015 En cas d’installation erronйe ou d’utilisation incorrecte, vous pouvez кtre appelй а payer l’intervention. \u0015 Ne vous adressez jamais а des techniciens non agrййs. Communiquez: • le type de panne; • le modиle de la machine (Rйfйrence); • le numйro de sйrie (S/N); Vous trouverez tous ces renseignements sur la plaquette signalйtique situйe sur le panneau arriиre de votre lave-linge. 24 Руководство по экпуатации СТИРАЛЬНАЯ МАШИНА CIS CIS РУССКИЙ Содержание Установка, 26-27 Распаковка и выравнивание, 26 Подключение к водопроводной и электрической сети, 26-27 Пробный цикл стирки, 27 Технические характеристики, 27 Описание стиральной машины, 28-29 Панель управления, 28 Как открыть и закрыть барабан, 29 Индикаторы, 29 Запуск машины. Программы, 30 Персонализация стирки, 31 Краткие инструкции: Порядок запуска программы, 30 Таблица программ, 30 AVTL 83 Выбор температуры, 31 Выбор скорости отжима, 31 Функции, 31 Моющие средства и белье, 32 Распределитель моющих средств, 32 Цикл отбеливания, 32 Подготовка белья, 32 Особенности стирки отдельных изделий, 32 Woolmark Platinum Care, 32 Предупреждения и рекомендации, 33 Общие правила безопасности, 33 Утилизация, 33 Экономия и охрана окружающей среды, 33 Обслуживание и уход, 34 Отключение воды и электричества, 34 Уход за стиральной машиной, 34 Уход за дверцей машины и барабаном, 34 Как чистить распределитель моющих средств, 34 Чистка насоса, 34 Проверка заливного шланга, 34 Устранение неисправностей, 35 Сервисное обслуживание, 36 # Установка +15 \u0015 Сохраните данное руководство. Оно должно быть в комплекте со стиральной машиной в случае продажи, передачи оборудования или при переезде на новую квартиру, чтобы новый владелец оборудования мог ознакомиться с правилами его функционирования и обслуживания. \u0015 Внимательно прочитайте руководство: в нем содержатся важные сведения по установке и безопасной эксплуатации стиральной машины. После установки машины на место проверьте по уровню горизонтальность верхней крышки корпуса, отклонение горизонтали должно быть не более 2°. Правильное выравнивание оборудования поможет избежать шума, вибраций и смещений во время работы машины. Если стиральная машина стоит на полу, покрытом ковром, убедитесь, что ее основание возвышается над ковром. В противном случае вентиляция будет затруднена или вовсе невозможна. Распаковка и выравнивание Распаковка 1. Распакуйте стиральную машину. 2. Убедитесь, что оборудование не было повреждено во время транспортировки. При обнаружении повреждений – не подключайте машину – свяжитесь с поставщиком немедленно. 3. Удалит е четыре транспортировочных винта и резиновые пробки с прокладками, расположенные в задней части стиральной машины (см. рис.). 4. Закройте отверстия прилагающимися пластиковыми заглушками. 5. Сохраняйте все детали: они Вам понадобятся при последующей транспортировке стиральной машины. болты, резиновые шайбы и большую металлическую поперечную планку. Закройте образовавшиеся отверстия пластмассовыми заглушками. Подключение к водопроводной и электрической сети Подсоединение заливного шланга A 1. Вставьте прокладку А в конец заливного шланга и наверните его на вывод водопровода холодной воды с резьбовым отверстием 3/4 дюйма (см. рис.). Перед подсоединением откройте водопроводный кран и дайте стечь грязной воде. 2. Подсоедините заливной шланг к стиральной машине, навинтив его на водоприемник, расположенный в задней верхней части справа (см. рис.). 3.Убедитесь, что шланг не перекручен и не пережат. \u0015 Не разрешайте детям играть с упаковочными материалами. Выравнивание 1. Установите стиральную машину на ровном и прочном полу, так чтобы она не касалась стен, мебели и прочих предметов. 2. После установки машины на место отрегулируйте ее устойчивое положение путем вращения передних ножек (см. рис.). Для этого сначала ослабьте контргайку, после завершения регулировки контргайку затяните. $ \u0015 Давление воды должно быть в пределах зна- чений, указанных в таблице Технических характеристик (см. с. 3). недостаточной, обратитесь в Авторизованный Сервисный центр. \u0015 Если длина водопроводного шланга окажется Подсоединение сливного шланга l розетка заземлена в соответствии с нормами безо- Повесьте загнутый конец сливного шланга на край раковины, ванны, или поместите в специальный вывод канализации. Шланг не 65 - 100 cm должен перегибаться. Верхняя точка сливного шланга должна находиться на высоте 65100 см от пола. Расположение сливного шланга должно обеспечивать разрыв струи при сливе (конец шланга не должен быть опущен в воду). В случае крепления на край ванной или раковины, шланг вешается с помощью направляющей (входит в комплект поставки), которая крепится к крану (рис. ). \u0015 Не рекомендуется применение удлинителей для сливного шланга, при необходимости допускается его наращивание шлангом такого же диаметра и длиной не более 150 см. лем, при условии, что защитная линия не имеет разрыва и подключена напрямую в обвод каких-либо приборов (например, электрического счетчика). Если вилка не подходит к розетке, ее следует заменить на новую, соответствующую розетке, или заменить питающий кабель. Замена кабеля должна производиться только квалифицированным персоналом. \u001Cдопускается организация заземления рабочим ну- пасности, описанными в данном разделе инструкции CIS Запрещается использование переходников, двойных и более розеток и удлинителей (они создают опасность возгорания). Если Вы считаете их использование необходимым, применяйте один единственный удлинитель, удовлетворяющий требованиям безопасности. Оборудование, подключенное с нарушением требований безопасности бытовых приборов большой мощности, изложенных в данной инструкции, является потенциально опасным. Производитель не несет ответственности за ущерб здоровью и собственности, если он вызван несоблюдением указанных норм установки. Первый цикл стирки По завершении установки, перед началом эксплуатации необходимо произвести один цикл стирки со стиральным порошком, но без белья, по программе 90°C без предварительной стирки. Подсоединение к электросети Внимание! Оборудование обязательно должно быть заземлено! 1. Машина подключается к электрической сети при помощи двухполюсной розетки с заземляющим контактом (розетка не поставляется с машиной). Фазный провод должен быть подключен через автомат защиты сети, рассчитанный на максимальный ток (ток срабатывания) 16 А, и имеющий время срабатывания не более 0,1 с. 2. При наличии вблизи от предполагаемого места установки машины розетки с заземляющим контактом, имеющей трехпроводную подводку кабеля с медными жилами сечением не менее 1,5 кв. мм (или алюминиевыми жилами сечением не менее 2,5 кв. мм), доработка электросети не производится. При отсутствии указанной розетки и проводки следует провести их монтаж. 3. Прокладка заземления отдельным проводом не допускается. 4. Для доработки электрической сети рекомендуется применять провод типа ППВ 3х1,5 380 ГОСТ 6223-79. Допускается применение других марок кабеля, обеспечивающих пожаро- и электробезопасность при эксплуатации машины. Перед включением машины в сеть убедитесь, что: l розетка и проводка соответствуют требованиям, изложенным в данном разделе инструкции; l напряжение и частота тока сети соответствуют данным машины; l розетка и вилка одного типа; Технические характеристики Модель AVTL 83 ш ирина 40 см высота 85 см глубина 60 см 1 - 5 кг С м о тр ите п а спо р тную та б л ичку с те хни че с ки м и ха р а кте р и с ти ка м и на м аш ине Размеры Загрузка Электрические параметры Гидравлические параметры Скорость отжима Kонтрольные программы согласно нормативу EN 60456 max давление 1 Мпа (10 бар) min давление 0,05 Мпа (0,5 бар) объем барабана 42 л до 800 об/мин программа 3; температура 60°С; при загрузке до 5 кг. Маш ина соответствует следующ им Директивам Европейского Экономического сообщ ества: - 89/336 /ЕЕС от 03.05.89 (электромагнитной совместимости) и последующ ие модификации - 2006/95/CE (низкого напряжения) % Описание стиральной машины +15 Панель управления Рукоятка регуляции скорости ОТЖИМА Рукоятка регуляции ТЕМПЕРАТУРЫ Кнопка ВКЛЮЧЕНИЕ/ ВЫКЛЮЧЕНИЕ Индикатор ЛЮК ЗАБЛОКИРОВАН Световые индикаторы Кнопки Кнопка ПУСК/ОТМЕНА Рукоятка выбора ДОПОЛНИТЕЛЬНЫЕ ФУНКЦИИ ПРОГРАММ Ячейка для стирального порошка, наполняе мая стиральным порошком и добавками (смотреть стр. 32). Световые индикаторы служат для контроля за выполнением программы стирки. Если была включена функция Таймер задержки, индикаторы показывают время, остающееся до запуска программы (смотреть стр. 29). Рукоятка ОТЖИМ служит для регуляции скорости отжима или для его исключения (смотреть стр. 31 ). Кнопки ДОПОЛНИТЕЛЬНЫЕ ФУНКЦИИ служат для подключения имеющихся дополнительных функций. Кнопка выбранной функции останется включенной. Рукоятка ТЕМПЕРАТУРА служит для регуляции температуры или для стирки в холодной воде (смотреть стр. 31). Кнопка ВКЛЮЧЕНИЕ/ВЫКЛЮЧЕНИЕ служит для включения и выключения стиральной машины. Кнопка ПУСК/ОТМЕНА служит для запуска программ или для отмены ошибочного программирования. Индикатор ВКЛЮЧЕНИЕ/ЛЮК ЗАБЛОКИРОВАН мигает, когда стиральная машина включена, и горит, не мигая, если люк не заблокирован ( смотреть стр. 29). Рукоятка выбора ПРОГРАММ служит для выбора программ (смотреть стр. 30). В процессе выполнения программы рукоятка остается неподвижной. Индикатор ВКЛЮЧЕНИЕ/ЛЮК ЗАБЛОКИРОВАН: Горящий индикатор означает, что люк заблокирован во избежание его случайного открывания. во избежание повреждений перед тем как открыть люк, необходимо дождаться, когда замигает индикатор. Частое мигание индикатора ВКЛЮЧЕНИЕ/ЛЮК ЗАБЛОКИРОВАН одновременно с любым другим индикатором означает неисправность (смотреть стр. 35). & Как открыть и закрыть барабан A) ОТКРЫВАНИЕ (рис. 1). Поднимите внешнюю крышку и полностью ее откройте. Б) Затем, используя обе руки, откройте барабан, как пока зано на рис. 2: - Нажмите кнопку, обозначенную стрелкой на рис. 2, слег ка вниз, другой рукой придерживая дверцы (так вы избежите внезапного открывания дверок и защемления пальцев); дверцы расцепятся и легко откроются. CIS Fig. 1 Fig. 2 В) ЗАГРУЗКА СТИРАЛЬНОЙ МАШИНЫ (рис. 3). Г) ЗАКРЫВАНИЕ (рис. 4). - закройте полностью барабан, опуская сначала переднюю дверцу, а затем заднюю; - затем удостоверьтесь, что крюки передней дверцы точно вошли в предназначенные места на задней дверце; - после того, как крюки защелкнулись, нажмите обе дверцы слегка вниз, чтобы убедиться они закрыты плотно; Fig. 3 Fig. 4 - и, наконец, закройте внешнюю крышку. Индикаторы Индикаторы сообщают пользователю важные сведения. Значение индикаторов: Кнопки выбора функции КНОПКИ ВЫБОРА ФУНКЦИИ также являются индикаторами. При выборе функции загорается соответствующая кнопка. Если выбранная функция является несовместимой с заданной программой, кнопка будет мигать, и такая функция не будет активирована. Если будет выбрана функция, несовместимая с другой, ранее выбранной функцией, останется включенной только последняя выбранная функция. Текущая фаза цикла: В процессе цикла стирки индикаторы будут загораться один за другим, показывая фазу выполнения программы: Предварительная стирка Стирка Полоскание Отжим Примечание: в процессе слива загорится индикатор, соответствующий циклу Отжима. ' Запуск машины. Программы +15 Краткие инструкции: Порядок запуска программы 1. Включите стиральную машину, нажав на кнопку. Все индикаторы загорятся на несколько секунд, затем погаснут, и индиактор ВКЛЮЧЕНИЕ/ЛЮК ЗАБЛОКИРОВАН начнет мигать. 2. Загрузите белье в барабан, засыпьте стиральное вещество и добавки (смотрите стр. 32), закройте крышки барабана и внешний люк. 3. Выбрать при помощи рукоятки выбора ПРОГРАММ Таблица программ Ткань и степень загрязнения П роТемпеграммa ратура Моющее средство предв. стирка основная стирка нужную программу. 4. Выбрать температуру стирки (см. стр. 31). 5. Выбрать скорость отжима (см. стр. 31). 6. Запустите программу, нажав кнопку ПУСК/СБРОС (Start/Reset). Для отмены запуска держите нажатой кнопку ПУСК/ СБРОС (Start/Reset) в течение 2-х секунд. 7. По завершении программы индикатор ВКЛЮЧЕНИЕ/ ЛЮК ЗАБЛОКИРОВАН замигает, сигнализируя, что можно открыть люк. Вынуть белье и оставить люк полуоткрытым для сушки барабана. Выключить стиральную машину, нажав кнопку. тбеливание Смягч- (Ф ункция)/ итель Отбеливатель Длительность цикла, Описание цикла стирки мин Хлопок сильным загрязнением Очен ь си л ьно загрязненн ое белое белье (простыни. скатерти и т.д.) Очен ь си л ьно загрязненн ое белое белье (простыни. скатерти и т.д.) Сильно загрязненное белое и прочно окрашенное цветное белье Слабо загрязненное белое и ли няющ ее цветное белье (рубаш ки, маки и пр.) Слабо загрязненное ли няющ ее цветное белье 1 90°C • • • • • • • • • • • • • • • • • • • • • • • • • Дели катн. Дели кат./ Обычный Дели кат./ Обычный Дели кат./ Обычный Дели кат./ Обычный 155 2 3 4 5 90°C 60°C 40°C 30°C 147 157 96 88 Предварительная стирка, стирка при высокой температуре, полоскание, промежуточный и окончательный отжим Стирка при высокой температуре, полоскание, промежуточный и окончательный отжим Стирка при 60°C, полоскание, промежуточный и окончательный отжим Стирка при 40°C, полоскание, промежуточный и окончательный отжим Стирка при 30°C, полоскание, промежуточный и окончательный отжим Стирка при 60°C, полоскание, остановка с водой или деликатный отжим Стирка при 50°C, полоскание, остановка с водой или деликатный отжим Стирка при 40°C, полоскание, остановка с водой или деликатный отжим Стирка при 30°C, полоскани е и деликатный отжим Синтетика Сильно загрязненная, прочно окраш енная цветная (детская одежда и пр.) Сильно загрязненная, прочно окраш енная цветная (детская одежда и пр.) Слабо загрязненная, деликатная цветная (любая одежда) Слабо загрязненная, деликатная цветная (любая одежда) 6 7 8 9 60°C 50°C 40°C 30°C Дели катн. Дели катн. Дели катн. 97 93 83 33 Деликатные ткани Шерсть Особо деликатные ткани и одежда (занавеси, шелк, вискоза и пр.) 10 11 40°C 30°C 48 55 Стирка при 40°C, полоскание и деликатный отжим Стирка при 30°C, полоскани е, остановка с водой или слив ЧАСТИЧНЫЕ ПР ОГР АММ Ы Полоскани е Дели катное полоскани е Отж и м Дели катный отж и м Сли в Полоскани е и отж и м Пполоскание, остановка с водой или слив Сли в и си льный отж и м Сли в и дели катный отж и м Сли в Примечание «Остановка с водой»: см. дополнительную функцию «Легкая глажка» на с. 31. Данные в таблице, являются справочными и могут меняться в зависимости от конкретных условий стирки (объем стирки, температура воды в водопроводной системе, температура в помещении и др.). Специальная программа Повседневная стирка 30' мин (программа 9 для Синтетических тканей) предназначена для быстрой стирки слабозагрязненного белья: цикл длится всего 30 минут, что позволяет сэкономить время и электроэнергию. Установив эту программу (9 при температуре 30°С), Вы можете стирать различные виды тканей вместе (за исключением шерсти и шелка) при максимальной загрузке белья 3 кг. Мы рекомендуем использовать жидкое моющее средство. \u001E Персонализация стирки Выбор температуры стирки производится при помощи рукоятки ТЕМПЕРАТУРА (см. Таблицу программ на стр. 30). Значение температуры может быть уменьшено вплоть до стирки в холодной воде ( ). Выбор температуры CIS Выбор скорости отжима выбранной программы производится при помощи рукоятки ОТЖИМ. Для разных программ предусматривается разная максимальная скорость отжима: Программы Хлопок Синтетика Шерсть Шелк Максимальная скорость отжима 800 оборотов в минуту 800 оборотов в минуту 600 оборотов в минуту без отжима Выбор скорости отжима Скорость отжима может быть уменьшена или же можно совсем исключить отжим, повернув рукоятку в. положение Машина автоматически не допускает установку скорости отжима, превышающую максимальную скорость, предусмотренную для каждой прораммы. \u0015 Во избежание чрезмерных вибраций перед каждым отжимом машина равномерно распределяет белье в барабане. Это происходит за счет непрерывного вращения барабана со скоростью, слегка превышающей скорость стирки. Если после нескольких попыток белье не распределяется равномерно, машина производит отжим с более низкой скоростью. При невозможности балансироки машина заменяет отжим операцией балансировки. Возможные попытки балансировки могут продлить общую продолжительность цикла макс. на 10 минут. Функции Различные функции стирки машины позволяют достичь желаемой чистоты и белизны вашего белья. Порядок выбора функций: 1. нажать кнопку нужной функции в соответствии с приведенной ниже таблицей; 2. включение соответствующей кнопки означает, что функция активирована. Примечание: Частое мигание кнопки означает, что данная функция не может быть активирована для заданной программы. Функции Назначение Использование Доступна с программами: 1, 2, 3, 4 5, 6, 7, 8 Все программы кроме 1, 2, 9,10 Слив. Супер стирка Позволяет получить безупречно чистое белье, заметно более Опция не используется с функцией «БЫСТРАЯ СТИРKА». белое по сравнению со стандартом Класса А. Уменьшение степен сминаемости тканей, облегчение последующего глажения. При выборе этой функции программы 6, 7,8, 11 прерываются без слива воды (остановка с водой) и сигнальная лампочка фазы Ополаскивания мигает: – Чтобы завершить цикл, нажмите кнопку ПУСK/СБРОС (Start/Resert). – Чтобы закончить программу сливом установите рукоятку программатора на соответствующий символ и нажмите кнопку ПУСK/СБРОС (Start/Resert). Опция не используется с функцией «СУПЕР СТИРKА». Применение этой функции рекомендуется при полной загрузке машины или при использовании большого количества моющего средства. Легкая глажка Сокращает продолжительность цикла стирки примерно на 30%. Повышает эффективность полоскания. Дополнительное полоскание Быстрая стирка 1, 2, 3, 4 5, 6, 7, 8 Полоскание. 1, 2, 3, 4, 5, 6, 7, 8, Полоскание. \u001F Моющие средства и белье +15 Распределитель моющих средств Хороший результат стирки зависит также от правильной дозировки моющего средства: его избыток не гарантирует более эффективную стирку, напротив может привести к образованию налетов внутри машины и загрязнению окружающей среды. Подготовка белья Выдвиньте распределитель и заполните его отделения моющим средством и смягчителем: • Разберите белье: - в соответствии с типом ткани / обозначения на этикетке - по цвету: отделите цветное белье от белого. • Выньте из карманов все предметы и проверьте хорошо ли держатся пуговицы. • Не превышайте максимальное нормы загрузки барабана, указанные для сухого белья: Прочные ткани: макс. 5 кг Синтетические ткани: макс. 2,5 кг Деликатные ткани: макс. 2 кг Шерсть: макс. 1 кг Вес белья 1 простыня 400 – 500 г 1 наволочка 150 -200 г 1 скатерть 400 – 500 г 1 халат 900 –1,200 г 1 полотенце 150 -250 г Отделение 1: моющее средство для предварительной стирки (порошок) ячейка 2: Стиральное вещество (порошок или жидкость) Жидкое стиральное вещество следует помещать непосредственно в барабан в специальном круглом пластмассовом дозаторе. ячейка 3: Добавки (ополаскиватель и т.д.) Когда вы наливаете ополаскиватель в ячейку 3, обращайте внимание, чтобы не превысить максимальный уровень, указанный отметкой «max». Ополаскиватель автоматически подается в барабан в процессе последнего ополаскивания. По завершении программы стирки в ячейке 3 остается вода. Она необходима для подачи в барабан очень густых ополаскивателей, т.е. для разбавления концентрированных ополаскивателей. Если в ячейке 3 останется воды больше нормального, это значит, что к анал слива ополаскивателя в барабан засорился. Смотрите описание чистки ячеек на стр.34. ячейка 4: Цикл отбеливания Обычный отбеливатель используется для прочных белых тканей, деликатный - для цветных, синтетических тканей и для шерсти. Не заливайте отбеливатель в ячейку-дозатор 4 выше отметки «макс.» ( смотрите рисунок). Для осуществления только отбеливания налейте отбеливатель в ячейку 4 и выберите Функции. Дополнительное полоскание Особенности стирки отдельных изделий Занавески: сверните и положите в наволочку или в сетчатый мешочек. Стирайте отдельно, не превышая половины загрузки барабана. Выберите программу 11, автоматически исключающую отжим. Стеганные куртки и пуховики: если пуховик на утином или гусином пуху, его можно стирать в стиральной машине. Выверните куртку наизнанку, загрузите в барабан не более 2-3 кг изделий. Повторите полоскание 1-2 раза, используйте деликатный отжим. Парусиновые туфли: Парусиновые туфли предварительно очистите от грязи и стирайте с прочными тканями или джинсами, если позволяет цвет. Не стирайте с белыми вещами. Шерсть: Для достижения наилучших результатов стирки загружайте не более 1 кг белья и используйте специальные жидкие средства, предназначенные для стирки шерстянных изделий. Woolmark Platinum Care (деликатность ручной стирки) Hotpoint Ariston установил новый стандарт высокоэффективаной стирки, признанный Компанией Woolmark с престижной маркой Woolmark Platinum Care. Если на вашей стиральной машине имеется логотип Woolmark Platinum Care, в ней можно стирать с отличным результатом шерстяные изделия на этикетке которых написано «только ручная стирка» (M.0303). Выберите программу 10 для всех изделий с этикеткой ) и используйте специальные «Ручная стирка»( средства для стирки шерсти (макс 1 кг). \u0015 Не используйте моющие средства, предназначенные для ручной стирки – образующаяся обильная пена ухудшает результат стирки и может вывести из строя стиральную машину. Предупреждения и рекомендации \u0015 Стиральная машина спроектирована и изготовлена в соответствии с международными нормами безопасности. Внимательно прочитайте настоящие предупреждения, составленные в целях вашей безопасности. • Утилизация старой стиральной машины: перед сдачей машины в утиль обрежьте питающий кабель и снимите дверцу. CIS Общие правила безопасности • Для домашнего использования. Данное изделие является бытовым электроприбором, не предназначенным для профессионального использования. Запрещается модифицировать его функции. • Стиральная машина должна использоваться только взрослыми лицами, с облюдающими инструкции, приведенные в данном руководстве. • Не касайтесь работающей машины, если ваши руки или ноги сырые; не пользуйтесь оборудованием босиком. • Не тяните за питающий кабель, чтобы вынуть вилку из розетки: беритесь за вилку. • Не открывайте распределитель моющих средств во время работы машины. • Не касайтесь сливаемой воды, ее температура может быть очень высокой. • При остановке машины разблокировка замка дверцы срабатывает с трехминутной задержкой. Не пытайтесь открыть дверцу в этом промежутке времени (а тем более во время работы оборудования!): это может повредить механизм блокировки. • В случае неисправности при любых обстоятельствах не касайтесь внутренних частей машины, пытаясь починить ее. • Следите, чтобы дети не приближались к работающей стиральной машине. • В процессе стирки дверца стиральной машины может нагреваться. • Если необходимо переместить стиральную машину, выполняйте эту операцию вдвоем или втроем с предельной осторожностью. Никогда не пытайтесь поднять машину в одиночку — оборудование чрезвычайно тяжелое. • Перед помещением в стиральную машину белья убедитесь, чтобы барабан был пуст. Экономия энергии и охрана окружающей среды Экологичная технология С новой технологией Ariston вы затратите воды в два раза меньше, а эффект от стирки будет в два раза выше! Вот почему вы не можете видеть воду через дверцу: ее очень мало. Это забота об окружающей среде без отказа от максимальной чистоты. И вдобавок ко всему, вы экономите электричество. Экономия моющих средств, воды, электроэнергии и времени • Для экономии ресурсов следует максимально загружать стиральную машину. Один цикл стирки при полной загрузке вместо двух циклов с наполовину загруженным барабаном позволяет сэкономить до 50% электроэнергии. • Цикл предварительной стирки необходим только для очень грязного белья. При цикле предварительной стирки расходуется больше стирального порошка, времени, воды и на 5 – 15% больше электроэнергии. • Если вы обработаете пятна пятновыводителем или замочите белье перед стиркой, это поможет избежать стирки при высоких температурах. Использование программы стирки при 60°C вместо 90°C, или 40°C вместо 60°C позволяет сэкономить до 50% электроэнергии. • Правильная дозировка стирального порошка в зависимости от жесткости воды, степени загрязнения и объема загружаемого белья помогает избежать нерационального расхода моющего средства и загрязнения окружающей среды: хотя стиральные порошки и являются биоразлагаемыми, они содержат вещества, отрицательно влияющие на экологию. Кроме того, по возможности избегайте использовать ополаскиватели. • Использование стиральной машины утром или вечером уменьшит пиковую нагрузку на электросеть. • Если белье должно сушиться в автоматической сушке, необходимо выбрать большую скорость отжима. Интенсивный отжим сэкономит время и электроэнергию при автоматической сушке. Меры безопасности Утилизация • Уничтожение упаковочного материала: соблюдайте действующие требования по утилизации упаковочных материалов. Обслуживание и уход +15 Отключение воды и электричества • Перекрывайте водопроводный кран после каждой стирки. Таким образом с окращается износ водопроводной системы стиральной машины и устраняется вероятность протечек. • Всегда вынимайте вилку из розетки перед мойкой и обслуживанием машины. Как достать предметы, упавшие в пространство между барабаном и кожухом машины: 1. снимите нижний плинтус в передней части стиральной машины, потянув обеими руками за его края ( смотрите рисунок); 2. выверните крышку фильтра, вращая ее против часовой стрелки ( см. рис. ): из насоса может вылиться немного воды – это нормальное явление. 3. т щ а т е л ь н о прочистите фильтр изнутри; 4. заверните крышку обратно; 5. установите на место переднюю панель, предварительно убедившись, что крюки вошли в соответствующие петли. Уход за стиральной машиной Внешние и резиновые части машины очищайте мягкой тканью с теплой мыльной водой. Не используйте растворители или абразивные чистящие средства. Уход за дверцей машины и барабаном • После каждой стирки оставляйте дверцу машины полуоткрытой во избежание образования в барабане неприятных запахов и плесени. Чистка насоса Стиральная машина имеет сливной насос самоочищающегося типа, который не требует очистки или особого обслуживания. Однако мелкие предметы (монеты, пуговицы и др.) могут случайно попасть в насос. Для их извлечения насос оборудован «уловителем» — фильтром, доступ к которому закрыт нижней передней панелью. Проверка заливного шланга \u0015 Убедитесь, что цикл стирки закончился, и отключите оборудование от сети. Проверяйте шланг не реже одного раза в год. При любых признаках течи или повреждения немедленно замените шланг. Во время работы машины неисправный шланг, находящийся под давлением воды, может внезапно лопнуть. \u0015 Никогда не используйте шланги, бывшие в употреблении. Как чистить распределитель моющих средств Разборка: Слегка нажмите на большую кнопку на передней стороне распределителя и вытяните его вверх (рис. 1). Чистка: Затем промойте распределитель под струей воды (рис. 3), используя старую зубную щетку. Выньте пару сифонов, вставленных в вершину отделений 1 и 2 (рис. 4), проверьте не забиты ли они и промойте их. Сборка: Установите пару сифонов в специальные отверстия и затем поместите распределитель на место, вставляя его до щелчка (рис. 4, 2 и 1). Рис. 1 !" Рис. 2 Рис. 3 Рис. 4 Неисправности и методы их устранения В случае неудовлетворительных результатов стирки или возникновения неисправностей, прежде чем обратиться в Авторизованный Сервисный центр (см. с. 36), прочитайте этот раздел. В большинстве случаев Вы можете решить возникшие проблемы сами. CIS Обнаруженная неисправность: Стиральная машина не включается. Цикл стирки не запускается. Возможные причины / Методы устранения: • Вилка не вставлена в розетку или вставлена плохо, не обеспечивая контакта. • В доме отключено электричество. • • • • • • • • • • Люк плохо закрыт (мигает индикатор Блокировки люка). Не была нажата кнопка. Не была нажата кнопка ПУСК/СБРОС (Start/Reset). Закрыт кран подачи воды. Заливной шланг не подсоединен к крану. Шланг пережат. Закрыт кран подачи воды. В доме нет воды. Недостаточное водопроводное давление. Не была нажата кнопка ПУСК/СБРОС (Start/Reset). Стиральная машина не заливает воду. Стиральная машина непрерывно заливает и сливает воду. • Сливной шланг расположен ниже 65 или выше 100 см. от пола (см. с. 27). • Конец сливного шланга погружен в воду (см. с. 27). • Настенный слив не имеет сливной трубы. Если сливной шланг встроен в канализацию, имейте ввиду, что на верхних этажах может создаваться «сифонный эффект» — машина одновременно сливает и заливает воду. Для предотвращения подобного эффекта устанавливается специальный клапан (антисифон). • Выбранная программа не предусматривает слив воды — для некоторых программ необходимо включить слив вручную (см с. 30). • Активизирована дополнительная функция Легкая глажка: для завершения программы нажмите кнопку ПУСК/СБРОС (Start/Reset) (см. с. 31). • Сливной шланг пережат (см. с. 27) или засорен. • Засор в канализации. • При установке стиральной машины барабан был разблокирован неправильно (см. с. 26). • Стиральная машина плохо выровнена (см. с. 26). • Зазор между машиной и стеной/мебелью недостаточен (см. с. 26). • Плохо закреплен заливной шланг (гайка на конце шланга неплотно затянута и неправильно установлена прокладка (см. с. 26). • Распределитель моющих средств забит остатками моющих средств (о чистке распределителя см. с. 34). • Плохо закреплен сливной шланг (см. с. 27). • Выключите машину и выньте штепсельную вилку из электророзетки, подождите 1 минуту и вновь включите машину. Если неисправность не устраняется, обратитесь в Техническии Сервис. • Используется моющее средство, неподходящее для автоматических стиральных машин с фронтальной загрузкой. • Передозировка моющего средства. Стиральная машина не производит слив и отжим. Сильная вибрация при отжиме. Протечки воды из стиральной машины. Индикатор ВКЛЮЧЕНИЕ/ЛЮК ЗАБЛОКИРОВАН часто мигает одновременно с любым другим индикатором. Избыточное пенообразование. Если после проверки машина продолжает работать не должным образом, обратитесь в Авторизованный Сервисный центр за помощью. (см. с. 36) !# Сервисное обслуживание +15 Перед тем как обратиться в Авторизованный Сервисный центр: • Убедитесь, что вы не можете устранить неисправность самостоятельно (см. с. 35). • Запустите программу повторно для проверки исправности машины. • В противном случае обратитесь в Авторизованный Сервисный центр по телефону, указанному в гарантийном документе. \u0015 Не пользуйтесь услугами лиц, не уполномоченных Производителем. При ремонте требуйте использования оригинальных запасных частей. При обращении в Авторизованный Сервисный центр сообщите: • тип неисправности; • номер гарантийного документа (сервисной книжки, сервисного сертификата и т.п.); • модель машины (Мод.) и серийный номер (S/N), указанные в информационной табличке, расположенной на задней панели стиральной машины. Сервис !$ Instrucciones para el uso LAVADORA Sumario ES Espaсol Instalaciуn, 38-39 ES Desembalaje y nivelaciуn, 38 Conexiones hidrбulicas y elйctricas, 38-39 Primer ciclo de lavado, 39 Datos tйcnicos, 39 Descripciуn de la lavadora, 40-41 Panel de control, 40 Cуmo abrir y cerrar el cesto, 41 Luces testigo, 41 Puesta en marcha y Programas, 42 En la prбctica: poner en marcha un programa, 42 Tabla de programas, 42 Personalizaciones, 43 AVTL 83 Seleccione la temperatura, 43 Seleccionar el centrifugado, 43 Funciones, 43 Cajуn de detergentes, 44 Ciclo de blanqueo, 44 Preparar la ropa, 44 Prendas especiales, 44 Woolmark Platinum care, 44 Detergentes y ropa, 44 Precauciones y consejos, 45 Seguridad general, 45 Eliminaciones, 45 Ahorrar y respetar el ambiente, 45 Mantenimiento y cuidados, 46 Excluir el agua y la corriente elйctrica, 46 Limpiar la lavadora, 46 Limpiar el contenedor de detergentes, 46 Cuidar la puerta y el cesto, 46 Cуmo limpiar la cubeta de detergente, 46 Limpiar la bomba, 46 Controlar el tubo de alimentaciуn de agua, 46 Anomalнas y soluciones, 47 Asistencia, 48 Antes de llamar a la Asistencia Tйcnica, 48 37 Instalaciуn ES \u0015 Es importante conservar este manual para poder consultarlo en cualquier momento. En caso de venta, de cesiуn o de traslado, verifique que permanezca junto con la lavadora para informar al nuevo propietario sobre el funcionamiento y brindar las correspondientes advertencias. \u0015 Lea atentamente las instrucciones: ellas contienen importante informaciуn sobre la instalaciуn, el uso y la seguridad. enroscando los pies delanteros (vйase la figura); el бngulo de inclinaciуn medido sobre la superficie de trabajo, no debe superar los 2є. Una cuidadosa nivelaciуn brinda estabilidad a la mбquina y evita vibraciones, ruidos y desplazamientos durante el funcionamiento. Cuando se instala sobre moquetas o alfombras, regule los pies para conservar debajo de la lavadora un espacio suficiente para la ventilaciуn. Desembalaje y nivelaciуn Desembalaje Conexiones hidrбulicas y elйctricas 1. Desembale la lavadora. 2. Controle que la lavadora no haya sufrido daсos durante el transporte. Si estuviera daсada no la conecte y llame al revendedor. 3. Quite los cuatro tornillos de protecciуn para el transporte y la arandela de goma con el correspondiente distanciador, ubicados en la parte posterior (ver la figura). Conexiуn del tubo de alimentaciуn de agua A 1. Introduzca la junta A en el extremo del tubo de alimentaciуn y enrуsquelo a un grifo de agua frнa con boca roscada de 3/4 gas (vйase la figura). Antes de conectarlo, haga correr el agua hasta que salga limpia. 2. Conecte el tubo de alimentaciуn a la lavadora enroscбndolo en la toma de agua correspondiente ubicada en la parte posterior arriba y a la derecha (vйase la figura). 3. Verifique que el tubo no tenga pliegues ni estrangulaciones. 4. Cierre los orificios con los tapones de plбstico suministrados con el aparato. 5. Conserve todas las piezas: cuando la lavadora deba ser transportada nuevamente, deberбn volver a colocarse. Atenciуn: si vuelve a utilizar los tornillos mбs cortos, se deben colocar arriba. \u0015 Los embalajes no son juguetes para los niсos. Nivelaciуn \u0015 La presiуn de agua del grifo debe estar comprendida dentro de los valores contenidos en la tabla de Datos tйcnicos (ver la pбgina del costado). \u0015 Si la longitud del tubo de alimentaciуn no fuera suficiente, dirнjase a una tienda especializada o a un tйcnico autorizado. 1. Instale la lavadora sobre un piso plano y rнgido, sin apoyarla en las paredes, muebles ni en ningъn otro aparato. 2. Si el piso no estб perfectamente horizontal, compense las irregularidades desenroscando o 38 Conexiуn del tubo de descarga 65 - 100 cm Conecte el tubo de descarga, sin plegarlo, a un desagьe de pared ubicado a una distancia del piso comprendida entre 65 y 100 cm; ES \u0015 No utilice alargadores ni conexiones mъltiples. \u0015 El cable no debe estar plegado ni sufrir compresiones. \u0015 El cable de alimentaciуn debe ser sustituido sуlo por tйcnicos autorizados. ЎAtenciуn! La empresa fabricante declina toda responsabilidad en caso de que estas normas no sean respetadas. o apуyelo al borde de un lavabo o de una baсera, uniendo la guнa suministrada con el aparato, al grifo (vйase la figura). El extremo libre del tubo de descarga no debe permanecer sumergido en el agua. Primer ciclo de lavado Despuйs de la instalaciуn y antes del uso, realice un ciclo de lavado con detergente y sin ropa, seleccionando el programa a 90єC sin prelavado. \u0015 No se aconseja utilizar tubos de prolongaciуn, de todos modos, si es indispensable, la prolongaciуn debe tener el mismo diбmetro del tubo original y no superar los 150 cm. Conexiуn elйctrica Datos tйcnicos Modelo AVTL 83 ancho 40 cm. altura 85 cm. profundidad 60 cm. de 1 a 5 kg. Ver la placa de caracterнsticas tйcnicas aplicada en la mбquina presiуn mбxima 1 MPa (10 bar) presiуn mнnima 0,05 MPa (0,5 bar) capacidad del cesto 42 litros mбxima 800 r.p.m. programa 3; temperatura 60єC; efectuado con 5 kg. de carga. Esta mбquina cumple con lo establecido por las siguientes Directivas de la Comunidad: - 89/336/CEE del 03/05/89 (Compatibilidad Electromagnйtica) y sucesivas modificaciones - 2006/95/CE - 2002/96/CE Antes de enchufar el aparato, verifique que: • la toma tenga la conexiуn a tierra y haya sido hecha segъn las normas legales; • la toma sea capaz de soportar la carga mбxima de potencia de la mбquina indicada en la tabla de Datos tйcnicos (ver al costado); • la tensiуn de alimentaciуn estй comprendida dentro de los valores indicados en la tabla de Datos tйcnicos (ver al costado) ; • la toma sea compatible con el enchufe de la lavadora. Si no es asн, sustituya la toma o el enchufe. Dimensiones Capacidad Conexiones elйctricas Conexiones hнdricas Velocidad de centrifugado Programas de control segъn la norma EN 60456 \u0015 La lavadora no debe ser instalada al aire libre, ni siquiera si el lugar estб preparado, ya que es muy peligroso dejarla expuesta a la lluvia o a las tormentas. \u0015 Una vez instalada la lavadora, la toma de corriente debe ser fбcilmente accesible. 39 Descripciуn de la lavadora ES Panel de control Perilla de CENTRIFUGADO Perilla de TEMPERATURA Botуn ENCENDIDO/ APAGADO Luz testigo de TAPA BLOQUEADA Luces testigo Botones Botуn START/RESET FUNCIУN Perilla de PROGRAMAS Contenedor de detergentes para cargar detergentes y aditivos ( vйase la pбg. 44). Luces testigo para seguir el estado de avance del programa de lavado. Si se seleccionу la funciуn Delay Timer, indicarбn el tiempo que falta para la puesta en marcha del programa ( ver la pбg. 41). Perilla de CENTRIFUGADO para seleccionar el centrifugado o excluirlo (ver la pбg. 43 ). Botones de FUNCIУN para seleccionar las funciones disponibles. El botуn correspondiente a la funciуn seleccionada permanecerб encendido. Perilla de TEMPERATURA para seleccionar la temperatura o el lavado en frнo (ver la pбg. 43 ). Botуn de ENCENDIDO/APAGADO para encender y apagar la lavadora. Botуn START/RESET para poner en marcha los programas o anular las selecciones incorrectas. Luz testigo de ENCENDIDO/TAPA BLOQUEADA para saber si la lavadora estб encendida (centelleante) y si la tapa se puede abrir (fija) (vйase la pбg. 41 ). Perilla de PROGRAMAS para seleccionar los programas ( vйase la pбg. 42). Durante el programa la perilla no se mueve. Luz indicadora de ENCENDIDO/PUERTA BLOQUEADA: La luz testigo encendida indica que la puerta estб bloqueada para impedir aperturas accidentales; para evitar daсos es necesario esperar que la luz testigo centellee antes de abrirla. \u0015 El centelleo rбpido de la luz indicadora de ENCENDIDO/PUERTA BLOQUEADA simultбneamente con, al menos, el de otra luz testigo, indica una anomalнa. Llame a la Asistencia Tйcnica. 40 Cуmo abrir y cerrar el cesto A) ABERTURA (Fig. 1) Levante la tapa externa y бbrala completamente B) Abra luego el cesto usando ambas manos, como se indica en la Fig. 2: - presione el botуn indicado por la flecha en la Fig. y, ejerciendo una leve presiуn hacia abajo, mantenga apoyada una mano, para evitar que las puertas se abran repentinamente haciendo mal a los dedos; - luego acompaсe las puertitas que se desengancharбn y se abrirбn fбcilmente. INTRODUCCIУN DE LA ROPA (Fig. 3) CIERRE (Fig. 4) - cierre bien el cesto bajando primero la puerta delantera y apoyando luego la posterior; - luego verifique que los ganchos de la puerta delantera estйn perfectamente alojados en la sede de la puerta posterior; - despuйs de haber escuchado el "clac" correspondiente al enganche, ejerza una leve presiуn hacia abajo sobre ambas puertas que no se deben desenganchar; - por ъltimo cierre la tapa externa. ES Fig. 1 Fig. 2 C) D) Fig. 3 Fig. 4 Luces testigo Las luces testigo suministran informaciуn importante. He aquн lo que nos dicen: Fase en curso: Durante el ciclo de lavado, las luces testigo se encenderбn progresivamente para indicar su estado de avance. Prelavado Lavado Aclarado Centrifugado Nota: durante la fase de descarga se iluminarб la luz testigo correspondiente a la fase de Centrifugado. Botones de FUNCIУN Los BOTONES DE FUNCIУN tambiйn actъan como luces testigo. Al seleccionar una funciуn, el botуn correspondiente se iluminarб. Si la funciуn seleccionada no es compatible con el programa elegido, el botуn centellearб y la funciуn no se activarб. Cuando se seleccione una funciуn incompatible con otra seleccionada precedentemente, permanecerб activa sуlo la ъltima selecciуn realizada. 41 Puesta en marcha y Programas ES En la prбctica: poner en marcha un programa 1. Encienda la lavadora pulsando el botуn. Todas las luces testigo se encenderбn durante algunos segundos, luego se apagarбn y la luz indicadora de ENCENDIDO/ PUERTA BLOQUEADA comenzarб a centellear. 2. Cargue la ropa, vierta el detergente y los aditivos (vйase la pбg. 44) y por ъltimo cierre las puertas y la tapa. 3. Seleccione el programa deseado con el mando de PROGRAMAS. 4. Fije la temperatura de lavado (ver la pбg. 43). 5. Fije la velocidad de centrifugado (ver la pбg. 43). 6. Ponga en marcha el programa pulsando el botуn START/RESET. Para anular, mantenga presionado el botуn START/RESET durante 2 segundos como mнnimo. 7. Al finalizar el programa, la luz indicadora de ENCENDIDO/PUERTA BLOQUEADA centellearб indicando que la puerta se puede abrir. Extraiga la ropa y deje la puerta semicerrada para permitir que el cesto se. seque. Apague la lavadora pulsando el botуn Tabla de programas Tipos de tejidos y de su ciedad Pr ogramas Temperatu ra Deter gen te Prelav. Lavado Su avizan te Opciуn Du r aciуn blan qu eo / del ciclo Blan qu ea(min u tos) dor Descr ipciуn del ciclo de lavado Al godуn Blancos ex t remadament e s ucios (s бbanas. mant eles. et c.) Blancos ex t remadament e s ucios (s бbanas. mant eles. et c.) Blancos y de color res is t ent es muy s ucios Blancos poco s ucios y colores delicados (camis as. camiset as, et c.) Colores delicados poco s ucios 1 2 3 4 5 90°C 90°C 60°C 40°C 30°C • • • • • • • • • • • Delicado / Tradicional Delicado / Tradicional Delicado / Tradicional Delicado / Tradicional 155 147 157 96 88 Prelavado, lavado, a clarados. cent rifugados int ermedios y final Lavado, a clarados. cent rif ugados int ermedios y final Lavado, a clarados. cent rif ugados int ermedios y final Lavado, a clarados. cent rif ugados int ermedios y final Lavado, a clarados. cent rif ugados int ermedios y final Lavado, a clarados. ant iarrugas o cent rif ugado delicado Lavado, a clarados. ant iarrugas o cent rif ugado delicado Lavado, a clarados. ant iarrugas o cent rif ugado delicado Lavado, a clarados y cent rif ugaciуn delicada Lavado, a clarados y cent rif ugaciуn delicada Lavado, a clarados. ant iarrugas o d es agьe Aclarad os y cent rifugado Aclarad os. ant iarrugas o d es agьe D es agьe y cent rifugado D es agьe y cent rifugaciуn Si nt йt i cos Colores resis t ent es muy s ucios (rop a para reciйn nacidos. et c.) Colores resis t ent es muy s ucios (rop a para reciйn nacidos. et c.) Colores delicados (rop a de t odo t ipo poco s ucia) Colores delicados (rop a de t odo t ipo poco s ucia) 6 7 8 9 60°C 50°C 40°C 30°C • • • • • • • • Delicado Delicado Delicado 97 93 83 33 Del i cados Lana Tejidos muy delicados (cort inas. s eda, vis cos a, et c.) PROGRAMAS PARCI ALES Aclarad o Aclarad o delicado 10 11 40°C 30°C • • • • Delicado 48 55 • • • • Cent rifugado Cent rifugado delicado Des agьe enйrgico delicada D es agьe Notas Para la descripciуn del antiarrugas: consulte Plancha fбcil, pбgina siguiente. Los datos contenidos en la tabla tienen un valor indicativo.
Service, 12. Before calling for Assistance, 12. WASHING MACHINE. AVTL 83. Instructions for use manual accompanies the washing machine to inform the new owner as to its. as a hand wash. Hotpoint Ariston sets a new standard of.
Инструкция для стиральных машин Ariston представлена для изучения и бесплатного скачивания. Стиральная машина Ariston (Аристон) практична в использовании и понятна в управлении. Ariston AVTL 83 (pdf - 373.8 КБ).
Схемы и циклограммы стиральных машины « Ariston » AVTL 83 EU, смотреть схему (подходит почти на все машины с вертикальной.
Как исправить неисправность стиральной машины Ariston HotPoint AVTL 83.
Instructions for use
Hotpoint- Ariston AVTL 83 Стиральные машины инструкция по эксплуатации, характеристики и руководство пользователя загрузить бесплатно в.